Vintage Dresser with Mirror Makeover: A Step-by-Step Guide
A vintage dresser with a mirror is a timeless piece of furniture that can add character and charm to any room. However, over time, these dressers can become worn and outdated. A makeover can breathe new life into an old dresser, transforming it into a focal point in your home. This article will guide you through the process of giving a vintage dresser with a mirror a complete transformation, covering key aspects from prep work to finishing touches.
1. Preparation and Cleaning
The first step is to prepare the dresser for the makeover. Start by removing all hardware, such as knobs, handles, and drawer pulls. Then, thoroughly clean the dresser using a mild soap and water solution. Pay close attention to removing grease, dirt, and grime, especially around the handle holes and in the crevices. Allow the dresser to dry completely before proceeding to the next step.
If the dresser has any loose or damaged areas, it's essential to address them before proceeding. Use wood filler to repair any holes or cracks, and consider using a wood glue to reinforce any weak joints. Let the filler and glue dry completely before sanding. For stubborn stains or previous paint layers, you might need to use a chemical stripper to remove them. Always wear appropriate safety gear when working with chemicals.
2. Painting and Refinishing
Once the dresser is clean and repaired, you can move on to painting and refinishing. Choosing the right paint color is crucial. Consider the style of your room and the overall décor. For a modern look, opt for bold colors like black, navy, or emerald green. For a more traditional style, classic shades like cream, white, or gray will create a timeless feel. You can also choose to paint the dresser in a two-toned color scheme, adding a pop of color to the drawers or legs.
Before painting, sand the dresser to smooth out any imperfections and to provide better adhesion for the paint. Use a fine-grit sandpaper for this purpose. After sanding, wipe the dust off the dresser with a damp cloth. Then, apply a primer to create a smoother and more even surface for the paint. Allow the primer to dry completely before applying the chosen paint. Apply multiple coats of paint for a smooth and durable finish, allowing each coat to dry thoroughly before applying the next.
3. Updating the Hardware
Replacing the old hardware can significantly enhance the look of the dresser. There are endless possibilities for hardware choices, from classic brass knobs to modern brushed nickel pulls. Consider the overall style of your dresser and room to choose the best hardware. When selecting hardware, ensure it is compatible with the drawer holes. If necessary, you can enlarge the existing holes to accommodate the new hardware.
Before installing the new hardware, clean the drawer faces and the new hardware with a damp cloth to remove any dust or debris. Then, align the new hardware with the drawer holes and secure it using screws. Make sure the screws are long enough to hold the hardware securely but not too long that they protrude from the back of the drawers.
4. Restoring the Mirror
The mirror is an integral part of the dresser and deserves special attention. If the mirror is simply dusty, you can clean it with a microfiber cloth and glass cleaner. If the mirror is scratched or has watermarks, you might need to use a specialized mirror polish. For deep scratches or damage, you might need to replace the mirror entirely.
Before installing a new mirror, ensure the back of the mirror is properly supported. Use a sturdy backing to prevent the mirror from warping or breaking. Make sure the mirror is level and secure to the dresser before proceeding to the next step.
5. Finishing Touches
Once the painting, hardware replacement, and mirror restoration are complete, you can add some final touches to complete the makeover. Consider adding a protective sealant to the paint, which will help to protect the dresser from scratches and spills. You can also add decorative elements, such as a lamp, a vase with flowers, or a framed print to enhance the dresser's aesthetics.
A vintage dresser with a mirror makeover can transform an outdated piece of furniture into a stylish and functional focal point in your home. With some time, effort, and creativity, you can create a unique and personalized dresser that will be a cherished part of your décor for years to come.

Image Result For Gaudy 70 S Dresser Mirror Makeover Painted Furniture Refinishing Rehab

How To Repurpose An Old Swivel Mirror Confessions Of A Serial Do It Yourselfer

The Best Painted Furniture Makeovers Of 2024

Pretty In Prelude Antique Dresser With Mirror Tuesday S Treasures Funcycled

Before And After Antique Dresser With Mirror

Antique Serpentine Dresser Makeover Confessions Of A Serial Do It Yourselfer

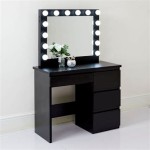
Vintage Mirror Dresser Makeover Painted Two Toned Black Wood Diy Furniture

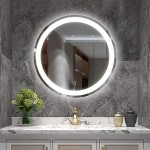
Vanity Dresser Turned Into A Bathroom Mirror The Happy Farmhouse

Diy European Farmhouse Mirror Makeover

The Best Way To Paint Furniture Vintage Vanity Makeover