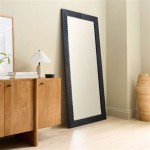
Wood Mirror Frame DIY
Creating a custom wood frame for a mirror offers a rewarding way to personalize home decor. This project allows for complete control over the frame's size, style, and finish, resulting in a unique piece perfectly suited to individual preferences and existing interior design. This article will guide readers through the steps involved in crafting a wooden mirror frame.
Materials and Tools: Before commencing, gather the necessary materials and tools. These will include the mirror itself, wooden boards (the type and dimensions depend on the desired frame style), wood glue, wood screws, measuring tape, a saw (miter saw recommended for angled cuts), sandpaper, wood stain or paint, a finish (such as polyurethane), clamps, a drill, and safety glasses.
Measuring and Cutting the Wood: Accurate measurements are crucial for a well-fitting frame. Measure the mirror's length and width precisely. Add the desired frame width to these measurements to determine the length of the wood pieces. For example, if the mirror is 20 inches wide and a 4-inch wide frame is desired, the horizontal frame pieces will each need to be 28 inches long (20 inches + 4 inches + 4 inches). A miter saw allows for precise 45-degree angle cuts, ensuring tight joints at the corners. When cutting, remember to account for the width of the saw blade, known as the kerf.
Assembling the Frame: Once the wood pieces are cut, dry-fit them around the mirror to ensure a proper fit. This is a crucial step to identify and correct any cutting errors before applying glue. Once satisfied with the fit, apply wood glue to the mitered edges of each piece. Then, carefully join the pieces together, forming a frame. Clamps are essential for holding the frame together securely while the glue dries. Follow the glue manufacturer's instructions for drying time.
Securing the Frame: After the glue has dried, further secure the frame by adding wood screws at each corner. Pre-drilling pilot holes is recommended to prevent the wood from splitting. These screws should be countersunk, meaning they are driven below the surface of the wood. Wood filler can then be used to conceal the screw holes, creating a seamless finish.
Sanding and Finishing: Sanding the frame creates a smooth surface for staining or painting. Start with a coarser grit sandpaper (around 120 grit) and gradually move to a finer grit (220 grit or higher) for a polished finish. Once sanding is complete, remove all dust with a tack cloth or a slightly damp cloth. The frame is now ready for staining or painting. Apply the chosen finish according to the manufacturer's instructions, allowing ample drying time between coats.
Attaching the Mirror: There are several methods for securing the mirror within the frame. One common method involves using mirror clips or mirror mounting tape. Mirror clips are small metal brackets that are screwed into the frame and hold the mirror in place. Mirror mounting tape is a strong adhesive tape specifically designed for securing mirrors. Another approach is to create a backing board for the frame and secure the mirror to this board using adhesive or clips. The chosen method will depend on the frame design and the weight of the mirror.
Frame Design Variations: The basic steps outlined above provide a foundation for numerous frame design variations. Consider incorporating decorative elements such as molding, routed edges, or inlaid designs. Different wood species offer various textures and colors, further customizing the frame's appearance. Experimenting with different stains and paints can also drastically alter the final aesthetic. Adding a beveled edge to the mirror itself can further enhance the overall visual appeal.
Wood Selection: Choosing the right type of wood is an important consideration. Hardwoods like oak and maple offer durability and a beautiful grain pattern. Softwoods like pine and cedar are more affordable but may require more care in handling and finishing. Reclaimed wood can add a rustic charm and is a sustainable option. Consider the desired style and the level of durability required when selecting wood.
Safety Precautions: Throughout the project, prioritize safety. Wear appropriate safety glasses when using power tools and sanding. Ensure adequate ventilation when working with stains, paints, and finishes. Follow all manufacturer safety recommendations for tools and materials. Taking necessary precautions ensures a safe and enjoyable crafting experience.
Finishing Techniques: The finishing process plays a significant role in the final appearance and durability of the frame. Applying multiple thin coats of stain or paint, rather than one thick coat, often yields a more even and professional-looking result. Allowing adequate drying time between coats is essential. A clear topcoat, such as polyurethane, protects the finish from scratches and wear, extending the life of the frame.

Diy Wood Framed Mirror The Grain Cottage

Diy Wood Framed Mirror The Grain Cottage

Diy Farmhouse Wood Frame Mirror She Gave It A Go

Diy Wood Framed Bathroom Mirror Christina Maria Blog

Diy Reclaimed Wood Mirror Frame Montreal

Wood Mirror Diy Shanty 2 Chic

Diy Farmhouse Wood Frame Mirror She Gave It A Go

How To Build A Mirror Frame Simple Woodworking

How To Frame A Mirror With Wood Diy

Modern Diy Rustic Mirror Frame H2obungalow