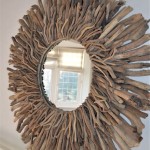
Wooden Mirror Frame DIY
Creating a custom wooden frame for a mirror offers a rewarding way to personalize home decor. This project can be adapted to suit various mirror sizes and interior design styles, offering a significant degree of creative control. This article will explore the process of building a wooden mirror frame, providing a detailed guide from material selection to finishing touches.
Materials and Tools: The first step involves gathering the necessary materials and tools. The wood type is a primary consideration. Popular choices include pine, oak, and walnut, each offering distinct aesthetic and durability characteristics. Pine is a cost-effective and readily available option, while oak and walnut provide greater hardness and richer grain patterns. The dimensions of the lumber should be chosen based on the desired frame width and depth, with 1x2 or 1x4 boards commonly used.
Other essential materials include wood glue, wood screws, measuring tape, a pencil, a saw (miter saw recommended for angled cuts), sandpaper of varying grits, wood filler (optional), and finishing supplies such as paint, stain, or sealant. Safety equipment like safety glasses and a dust mask are also crucial.
Measurements and Cutting: Accurate measurements are paramount to a successful frame construction. Measure the mirror's length and width precisely. Add twice the desired frame width to each dimension to determine the length of the frame pieces. For example, for a mirror measuring 20 inches wide and 30 inches long, with a desired frame width of 3 inches, the frame pieces would need to be 26 inches and 36 inches long, respectively.
A miter saw is recommended for cutting the wood at 45-degree angles to create mitered joints. This technique yields a professional-looking frame with clean corners. Ensure the saw blade is sharp and the wood is securely clamped down before making each cut. Double-check all measurements before cutting to avoid costly mistakes.
Assembling the Frame: Once the pieces are cut, dry-fit them around the mirror to ensure a proper fit. Adjustments can be made at this stage by lightly sanding the edges if necessary. Apply wood glue to the mitered edges of each piece, then carefully join them together, forming a rectangular frame. Use clamps to hold the pieces firmly in place while the glue dries. Follow the glue manufacturer’s instructions for drying times.
For added stability, reinforce the joints with wood screws. Pre-drill pilot holes to prevent the wood from splitting. Choose screws that are slightly shorter than the combined thickness of the two joined pieces. Countersink the screws, allowing them to sit flush with the wood surface. Wood filler can be used to fill the screw holes, creating a seamless finish.
Sanding and Finishing: Sanding is crucial for achieving a smooth and professional-looking frame. Begin with a coarser grit sandpaper (around 80-grit) to remove any imperfections or excess glue, then progressively move to finer grits (120, 150, and finally 220-grit) for a polished surface. Sanding in the direction of the wood grain will minimize scratches.
The finishing stage offers an opportunity to personalize the frame's appearance. Painting provides a wide range of color options, while staining enhances the natural beauty of the wood grain. Before painting or staining, ensure the frame is clean and free of dust. Apply the chosen finish evenly, following the manufacturer's instructions. Multiple coats may be required for optimal coverage and durability.
A sealant can be applied as a final step to protect the frame from moisture and wear. Choose a sealant appropriate for the chosen finish. Allow ample drying time between coats and before handling the frame.
Attaching the Mirror: Several methods can be used to secure the mirror within the frame. Mirror clips, available at most hardware stores, are a common and easy-to-use option. Alternatively, strong adhesive can be used, ensuring compatibility with both the mirror and the frame material. Follow the manufacturer's instructions for application and drying times.
Hanging the Mirror: The method for hanging the mirror will depend on the frame's size and weight. D-rings and wire are a standard solution for lighter frames, while heavier frames might require more robust hanging hardware. Ensure the chosen hanging method is securely attached to the back of the frame and can support the weight of the mirror.
Building a wooden mirror frame is a fulfilling project that combines craftsmanship with personal expression. With careful planning, precise execution, and attention to detail, a custom-made frame can enhance any living space.

Diy Farmhouse Wood Frame Mirror She Gave It A Go

Diy Farmhouse Wood Frame Mirror She Gave It A Go

Diy Farmhouse Wood Frame Mirror She Gave It A Go

Wood Mirror Diy Shanty 2 Chic

Diy Rustic Wood Frame Mirror Amanda Katherine

Diy Framed Mirror Jaime Costiglio

Diy Wood Framed Bathroom Mirror Christina Maria Blog

How To Build A Diy Wood Mirror Frame The Holtz House

Mirror Frame Diy How To Update A Basic Bathroom Our Faux Farmhouse

Diy Wood Framed Bathroom Mirror Christina Maria Blog

