How to Make a Backlit Mirror
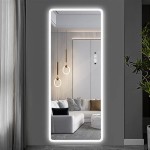
A backlit mirror is a stunning decorative element that can add a touch of modern elegance to any room. The soft, warm glow emanating from behind the mirror creates a captivating visual effect, transforming a simple reflective surface into a striking focal point. This article will guide you through the process of creating a backlit mirror, providing step-by-step instructions and helpful tips to ensure a successful project.
1. Gather Your Materials
Before embarking on your backlit mirror project, it is essential to gather all the necessary materials. The specific items may vary depending on the size and design of your mirror, but generally include:
- Mirror: Choose a mirror that suits your desired size and style. Consider the existing decor of your room while selecting the shape and frame.
- Light source: LED strip lights are commonly used for backlit mirrors due to their energy efficiency, longevity, and flexibility. Select a strip light with a color temperature and brightness that complements your aesthetic preferences.
- Power supply: Ensure that the power supply you choose is compatible with the LED strip lights and can handle the required voltage and amperage.
- Mirror adhesive: A strong and reliable adhesive, such as epoxy resin, is essential for securely mounting the LED strip lights to the back of the mirror.
- Electrical wire: The wire will connect the power supply to the LED strip lights.
- Optional accessories: These may include a dimmer switch, a mounting bracket for the power supply, or a decorative trim for the edges of the mirror.
It's advisable to purchase all materials from a reputable supplier to ensure high quality and compatibility.
2. Prepare the Mirror
Once you have gathered the necessary materials, you can begin preparing the mirror for the installation process. The steps involve:
- Clean the mirror: Thoroughly clean the back of the mirror using a gentle cleaning solution and a soft cloth. Remove any dust, dirt, or debris that could interfere with the adhesion of the LED strip lights.
- Measure and mark: Measure the length of the LED strip lights and mark the desired position on the back of the mirror. It's crucial to ensure that the LED strip lights are evenly distributed along the perimeter of the mirror for a balanced glow.
- Apply adhesive: Apply a generous amount of mirror adhesive to the marked areas on the back of the mirror. This will secure the LED strip lights in place and prevent them from detaching during use.
Take extra care when handling the mirror to avoid any damage. Ensure that the adhesive is properly spread and adheres firmly to the mirror's surface before proceeding to the next step.
3. Install the LED Strip Lights
Installing the LED strip lights is a crucial step in creating your backlit mirror. Follow these instructions carefully:
- Attach the LED strip lights: Carefully place the LED strip lights along the marked areas on the back of the mirror, ensuring they are properly aligned. Gently press down on the strip lights to ensure they are securely adhered to the mirror adhesive.
- Connect the power supply: Connect one end of the LED strip lights to the power supply using the electrical wire. Ensure that the connections are tight and secure.
- Test the lighting: Plug the power supply into a wall outlet and test the LED strip lights to ensure they are functioning correctly. Adjust the brightness and color temperature settings as desired.
- Secure the power supply: If you have a mounting bracket, secure the power supply to the wall or a nearby surface using screws or adhesive.
Remember to exercise caution when handling electrical components and avoid touching the live wires. If you are unsure about any aspect of the electrical installation, it is advisable to consult a qualified electrician.
4. Optional Enhancements
Once the backlit mirror is assembled, you can add optional enhancements to personalize it further. These enhancements can include:
- Dimmer switch: Install a dimmer switch to control the brightness of the LED strip lights, allowing you to adjust the ambiance based on your preferences and the time of day.
- Decorative trim: Use decorative trim to cover the edges of the mirror, adding aesthetic appeal and concealing the LED strip lights from view.
- Additional lighting effects: Consider incorporating features like built-in Bluetooth connectivity or remote controls for controlling the color and lighting effects of the LED strip lights.
These optional enhancements can add a touch of personalization and enhance the overall aesthetic appeal of your backlit mirror.

Bathroom Remodel Diy Backlit Mirror Leah And Joe Home Projects Crafts

Bathroom Remodel Diy Backlit Mirror Leah And Joe Home Projects Crafts

25 Beautiful Diy Vanity Mirror That Is Easy And To Do Most Of This Projects Can Be Bathroom Makeover Small Mirrors

Bathroom Remodel Diy Backlit Mirror Leah And Joe Home Projects Crafts

Diy Led Framed Mirror Modern Builds Ep 74
:max_bytes(150000):strip_icc()/makesandmunchies-c136f898cca640faa72b6209012230cb.jpg?strip=all)
7 Diy Lighted Mirror Ideas To Add A Little Extra Shine Your Space

How To Make Cute Lighted Leaning Mirror

How To Diy Vanity Mirror With Led Strip Lights

Custom Led Backlit Bathroom Mirror Diy Project

How To Diy Vanity Mirror With Led Strip Lights

