LED Bathroom Mirror Installation
LED bathroom mirrors offer a sleek, modern aesthetic and enhanced functionality compared to traditional mirrors. Their integrated lighting provides focused task lighting for grooming while also contributing to the overall bathroom ambiance. However, installing an LED mirror requires careful planning and execution. This article provides a comprehensive guide to the installation process.
Before beginning the installation, gather the necessary tools and materials. These typically include a stud finder, level, measuring tape, drill with appropriate drill bits (including a masonry bit if installing on a tile wall), screwdriver, wire strippers/cutters, wire connectors, electrical tape, safety glasses, and gloves. Always consult the manufacturer's instructions included with the specific LED mirror for any unique requirements or recommendations.
Safety is paramount during any electrical installation. Before commencing any work, turn off the power to the bathroom circuit at the main electrical panel. Double-check the power is off by testing the existing light fixture switch. Using a non-contact voltage tester is also recommended to ensure no live wires are present.
The next step involves careful planning and measurement. Determine the desired location of the mirror, considering factors such as height, proximity to the sink and other fixtures, and alignment with existing lighting. Mark the desired position of the mirror on the wall using a pencil or masking tape. Use a level to ensure the markings are perfectly horizontal.
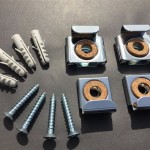
Most LED mirrors are designed for wall mounting and come with mounting brackets or a hanging system. Locate the wall studs using a stud finder and mark their positions. If possible, mounting the mirror directly to wall studs provides the most secure installation. If the mirror's mounting points do not align with the studs, appropriate wall anchors will be required. The type of wall anchor required depends on the wall material (drywall, tile, concrete, etc.) and the weight of the mirror. Consult the mirror's installation instructions and the wall anchor packaging for weight limits and appropriate applications.
Once the mounting points are marked, carefully drill pilot holes for the screws or mounting hardware. If installing on a tile wall, use masking tape over the marked drilling points to prevent the drill bit from slipping. A masonry drill bit will be needed for drilling through tile. Ensure the drilled holes are the correct size for the anchors or screws being used.
With the mounting hardware securely in place, the next step is the electrical connection. Most LED mirrors require a direct connection to the bathroom's electrical wiring. This typically involves connecting the mirror's wires (usually black for hot, white for neutral, and green or bare copper for ground) to the corresponding wires in the junction box behind the wall. Use wire connectors to secure the connections and wrap them with electrical tape for added insulation and protection.
Some LED mirrors offer different wiring configurations, such as a plug-in option or the ability to connect to an existing light fixture. Carefully review the manufacturer's instructions for the specific wiring diagram and follow the recommended procedures. If connecting to an existing light fixture, it may be necessary to bypass the fixture's switch and connect the mirror directly to the power supply.
After completing the electrical connections, carefully mount the mirror onto the installed brackets or hanging system. Ensure the mirror is level and securely fastened to the wall. Once the mirror is mounted, restore power to the bathroom circuit at the main electrical panel. Test the mirror's lighting functionality to ensure all connections are correct and the mirror is operating as expected.
For installations involving tile walls, additional considerations are necessary. Using a diamond-tipped hole saw is recommended for creating clean, precise cutouts in the tile for wiring access. Specialized waterproof sealant should be used around any penetrations in the tile to prevent water damage.
Regular maintenance of the LED mirror is essential for optimal performance and longevity. Clean the mirror surface with a soft, damp cloth and a mild glass cleaner. Avoid using abrasive cleaners or harsh chemicals, as these can damage the reflective surface and the LED lighting components. Periodically inspect the wiring and connections to ensure they remain secure and free from damage.
While this guide provides a general overview, the specific installation process may vary depending on the model of LED mirror and the existing bathroom wiring. Consulting a qualified electrician is always recommended for complex installations or if there are any uncertainties regarding the electrical work. Proper installation ensures the safety and functionality of the LED mirror, enhancing the bathroom's aesthetic and providing years of reliable service.

Diy Led Mirror Installation Personal Tips And Review

2 Ways To Wire Led Bathroom Mirror Hauschenhome

Installation And After Care Guide Led Vanity Mirrors Ledmyplace

Inlight Led Wall Mounted Lighted Vanity Mirror Installation Guide

How To Install Bathroom Led Mirror

How To Install A Led Bathroom Mirror Wiring Heated

Decoraport 55 X 36 Inch Led Bathroom Mirror With Touch On Anti Fog Dimmable Bluetooth Speakers Vertical Horizontal Mount D422 5536a Usa

Decoraport 55 X 36 Inch Led Bathroom Mirror With Touch On Anti Fog Dimmable Vertical Horizontal Mount D205 5536 Usa

Mi Mirror Hanging Oval Bathroom Led

Rectangular Led Heated Bathroom Mirror 1200 X 600m Ariel Better Bathrooms

