Enhancing Aesthetics and Functionality: Moulding Around Mirrors
The incorporation of mirrors into interior design serves both functional and aesthetic purposes. Mirrors can visually expand spaces, enhance natural light, and add a decorative element to any room. While a mirror itself can be visually appealing, surrounding it with moulding elevates its presence, creating a more polished and sophisticated look. This article explores the various aspects of moulding around mirrors, examining its benefits, design considerations, installation techniques, and the materials involved.
Moulding, in its simplest form, is a strip of material used to cover transitions or embellish surfaces. When applied to mirrors, moulding can transform a plain reflective surface into a focal point. It provides definition, adds architectural interest, and can be tailored to match the existing style of a room. The choice of moulding style, size, and material significantly impacts the overall aesthetic, making it a crucial element in achieving the desired design effect.
The Benefits of Using Moulding Around Mirrors
The application of moulding around a mirror extends beyond mere aesthetics. It offers several practical and visual advantages that contribute to the overall appeal and perceived value of a space. These benefits encompass both design enhancement and functional improvements, making it a worthwhile investment for homeowners and interior designers alike.
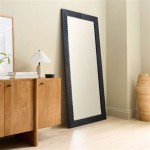
Firstly, moulding enhances the mirror's visual appeal. It frames the reflective surface, creating a defined boundary that draws the eye and establishes the mirror as a deliberate design element rather than a mere fixture. The moulding acts as a visual anchor, providing a sense of structure and order that elevates the overall appearance of the room.
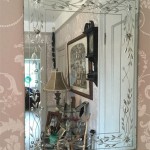
Secondly, moulding can conceal imperfections or unfinished edges. Mirrors are often installed with gaps or exposed edges, which can detract from their overall appearance. Moulding effectively covers these imperfections, creating a clean and polished finish. This is particularly important in bathrooms or areas where the mirror is exposed to moisture, as it prevents water damage and protects the edges of the mirror.
Thirdly, moulding allows for personalization and customization. With a wide array of styles, materials, and finishes available, moulding can be tailored to complement the existing décor and architectural style of a room. Whether the desired aesthetic is traditional, modern, or eclectic, there is a moulding option to suit every taste and preference. This level of customization ensures that the mirror seamlessly integrates into the overall design scheme.
Fourthly, moulding can add architectural interest and dimension to a room. In spaces with minimal architectural details, moulding around a mirror can introduce visual depth and texture. It can transform a flat, unadorned wall into a more dynamic and engaging space. This is especially beneficial in smaller rooms where maximizing visual impact is crucial.
Fifthly, strategically chosen moulding can enhance the perceived size of a room. By creating a visual frame around the mirror, it can trick the eye into perceiving the space as larger than it actually is. This is achieved by reflecting light and creating the illusion of depth, making it an effective technique for maximizing space in compact areas.
Design Considerations for Mirror Moulding
Selecting the appropriate moulding for a mirror involves careful consideration of several factors to ensure a cohesive and aesthetically pleasing result. The design process encompasses style, size, material, and finish, all of which contribute to the overall impact of the framed mirror within the space.
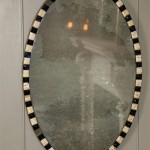
The style of the moulding should complement the overall architectural style of the room. For traditional spaces, ornate mouldings with intricate carvings or details are often a suitable choice. These mouldings add a touch of elegance and sophistication, enhancing the classic aesthetic. In contrast, modern spaces typically benefit from simpler, cleaner lines. Sleek, minimalist mouldings with a flat profile or slight bevel can create a contemporary and streamlined look.
The size of the moulding should be proportional to the size of the mirror and the surrounding space. Overly large moulding can overwhelm a small mirror or room, while excessively small moulding may appear insignificant and fail to make a visual impact. A balanced approach is crucial in achieving a harmonious and visually appealing result. As a general guideline, consider the scale of the room and the mirror to determine the appropriate width and thickness of the moulding.
The material of the moulding should be chosen based on durability, aesthetics, and environmental considerations. Wood is a classic and versatile option, offering a wide range of species, grains, and finishes. It can be easily painted or stained to match the existing décor. Polyurethane moulding is a durable and moisture-resistant alternative that is well-suited for bathrooms or other areas prone to humidity. It is also lightweight and easy to install. MDF (Medium Density Fiberboard) moulding is a cost-effective option that can be painted or primed. However, it is not as resistant to moisture as wood or polyurethane.
The finish of the moulding should complement the color scheme and hardware finishes in the room. Painted moulding offers a wide range of color options, allowing for seamless integration with the existing décor. Stained moulding can highlight the natural beauty of the wood grain, adding warmth and character to the space. Metallic finishes, such as gold, silver, or bronze, can add a touch of glamour and sophistication. The choice of finish should be carefully considered to ensure a cohesive and visually appealing result.
Consider the overall design intent. Is the goal to create a subtle and understated look, or to make a bold and dramatic statement? The choice of moulding should reflect the desired aesthetic and contribute to the overall ambiance of the room. Experiment with different styles, sizes, materials, and finishes to find the perfect combination that complements the mirror and enhances the space.
Installation Techniques for Mirror Moulding
Proper installation of moulding around a mirror is essential for achieving a professional and aesthetically pleasing result. While it can be a DIY project for experienced homeowners, careful planning and execution are crucial for a successful outcome. This section outlines the essential steps and techniques involved in installing moulding around a mirror.
Firstly, accurate measurements are paramount. Before cutting any moulding, carefully measure the dimensions of the mirror to determine the exact length of each piece needed. Use a precise measuring tape and double-check your measurements to avoid costly errors. Remember to account for the mitre cuts at the corners, which will slightly reduce the overall length of each piece.
Secondly, mitre the corners correctly. Mitre cuts are angled cuts that create a clean and seamless joint at the corners of the frame. Use a mitre saw or a mitre box and hand saw to make precise 45-degree cuts on each end of the moulding pieces. Ensure that the corners align perfectly and create a smooth, even seam. A slight discrepancy in the mitre cut can result in a noticeable gap or unevenness at the corners.
Thirdly, apply adhesive thoughtfully. Apply a bead of construction adhesive to the back of each moulding piece, ensuring that it is evenly distributed. Position the moulding carefully around the mirror, aligning it properly with the edges. Press the moulding firmly against the wall or surface to ensure a strong bond. Avoid using excessive adhesive, as it can squeeze out and create a messy appearance.
Fourthly, secure with finishing nails or brad nails. In addition to adhesive, reinforce the moulding with finishing nails or brad nails. Use a nail gun or a hammer and nail set to drive nails through the moulding and into the wall or surface behind the mirror. Space the nails evenly along the length of the moulding, ensuring that they are properly countersunk to prevent them from protruding. This will provide additional support and stability, especially for heavier moulding pieces.
Fifthly, fill nail holes and seams. Once the adhesive has dried and the nails are securely in place, fill any nail holes or seams with wood filler or caulk. Use a putty knife to apply the filler smoothly and evenly, ensuring that it blends seamlessly with the surrounding moulding. Allow the filler to dry completely before sanding it smooth with fine-grit sandpaper. This will create a flawless and professional finish.
Sixthly, paint or stain the moulding. If the moulding is unfinished, paint or stain it to match the existing décor. Apply a primer coat to ensure proper adhesion and coverage. Then, apply two or three coats of paint or stain, allowing each coat to dry completely before applying the next. Use a brush or a spray gun to achieve a smooth and even finish. Be sure to protect the mirror from overspray or drips by covering it with masking tape or plastic sheeting.
Finally, caulk the edges for a clean finish. Apply a bead of paintable caulk along the edges of the moulding where it meets the wall or mirror. This will seal any gaps and create a clean, finished look. Use a wet finger or a damp cloth to smooth the caulk and remove any excess. Allow the caulk to dry completely before painting over it to match the moulding.

Easy Diy Tutorial Adding Trim Around A Giant Mirror For Ers

How To Frame A Mirror

Mirror Molding The Easy Upgrade To Boring Bathrooms Mirrorchic

Bathroom Mirror Framed With Crown Molding Large Mirrors Frame Makeover

Diy Bathroom Mirror Frame With Molding The Happier Homemaker

How To Frame A Mirror Sand And Sisal

Easy Diy Tutorial Adding Trim Around A Giant Mirror For Ers

How To Frame Out That Builder Basic Bathroom Mirror For 20 Or Less

The Kids Bathroom Mirror Gets Framed House Of Hepworths

Adding Wood Trim To Our Vanity Mirror 10 Diy Growit Buildit