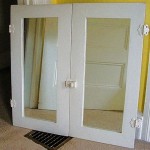
Wood Frame Bathroom Mirror DIY
A framed bathroom mirror elevates a standard, builder-grade mirror into a stylish and personalized focal point. Constructing a wood frame offers a customizable and cost-effective solution. This article provides a comprehensive guide to crafting a DIY wood frame for a bathroom mirror.
Planning and Material Selection
Accurate measurements are paramount. Measure the mirror's length and width precisely to determine the frame's dimensions. Consider the desired frame width, ensuring it complements the mirror and bathroom's overall scale. Popular wood choices for bathroom frames include cedar, redwood, and pine due to their moisture resistance. Other hardwoods like maple or oak can be used, but require more meticulous sealing to prevent water damage.
Essential Tools and Materials
Gathering the necessary tools and materials beforehand streamlines the construction process. The following list provides a comprehensive overview:
- Measuring Tape
- Safety Glasses
- Wood Glue
- Wood Filler
- Sandpaper (various grits)
- Miter Saw (or hand saw with miter box)
- Clamps
- Finish Nails
- Nail Set
- Wood Stain (optional)
- Polyurethane or other sealant
- Paintbrushes or Foam Applicators
- Mirror Adhesive
- Chosen Wood (1x2, 1x3, 1x4 are common choices)
Cutting and Assembling the Frame
Using a miter saw ensures precise 45-degree angle cuts for clean frame corners. Mark the wood pieces carefully, double-checking measurements before cutting. For those using a hand saw, a miter box aids in achieving accurate angles. After cutting, dry-fit the frame pieces around the mirror to confirm proper fit and alignment. Disassemble and apply wood glue to the mitered edges, then reassemble, securing each corner with clamps. Allow the glue to dry completely according to the manufacturer's instructions.
Reinforcing the Frame
Once the glue dries, enhance frame stability with finish nails. Pre-drill pilot holes to prevent wood splitting, especially with harder woods. Drive the nails at each corner, countersinking them slightly with a nail set. Fill the nail holes with wood filler and allow it to dry. Sand the filled areas smooth, blending them seamlessly with the frame surface. This creates a professional and polished appearance.
Finishing the Frame
The finishing process protects the frame and enhances its aesthetic appeal. Sand the entire frame with progressively finer grits of sandpaper, starting with a coarser grit (e.g., 120) and working up to a finer grit (e.g., 220). This ensures a smooth surface for the finish to adhere properly. If desired, apply a wood stain to achieve the desired color. Follow the stain manufacturer's instructions for application and drying times.
Sealing the Frame
Protecting the wood frame from moisture is crucial in a bathroom environment. Apply at least two coats of polyurethane or another suitable sealant, allowing each coat to dry completely before applying the next. This sealant protects the wood from humidity and water splashes, ensuring the frame's longevity. Choose a sealant appropriate for the chosen wood type and desired finish (matte, satin, or gloss).
Attaching the Frame to the Mirror
Once the sealant is fully cured, carefully apply mirror adhesive to the back of the frame. Follow the adhesive manufacturer's instructions for application and drying times. Align the frame with the mirror's edges and press firmly, ensuring even contact. Use painter's tape or clamps to hold the frame in place while the adhesive sets. Avoid using excessive adhesive, which can squeeze out and create a messy appearance.
Mounting the Mirror
After the adhesive cures completely, the framed mirror is ready for mounting. Depending on the mirror's weight and size, appropriate mounting hardware should be selected. Consult local building codes for specific requirements. Common mounting methods include using D-rings and wire, mirror clips, or adhesive mounting strips for lighter mirrors. Ensure the chosen mounting method provides secure and stable support.
Maintenance and Care
Regular cleaning with a damp cloth and mild soap solution keeps the framed mirror looking its best. Avoid abrasive cleaners or excessive moisture, as this can damage the finish and the wood. Promptly address any spills or splashes to prevent water damage. Periodically inspect the sealant for signs of wear and reapply as needed to maintain the frame's protective barrier.

Mirror Frame Diy How To Update A Basic Bathroom Our Faux Farmhouse

Bathroom Renovation Diy Mirror Makeover My Happy Simple Living

Diy Framed Bathroom Mirrors Living With Lady

Diy Wood Framed Bathroom Mirror Christina Maria Blog

How To Build A Wood Frame Around Bathroom Mirror Young House Love

Mirror Frame Diy How To Update A Basic Bathroom Our Faux Farmhouse

How To Diy Upgrade Your Bathroom Mirror With A Stained Wood Frame Building Our Rez Mirrors Framed

Diy Mirror Frame Transforming An Old Bathroom With A Wood

Diy Bathroom Mirror Frame For Under 10 O Hayley Blog

How To Frame A Mirror