Build Your Own Bathroom Mirror: A Comprehensive Guide
A bathroom mirror is more than just a reflective surface; it's a critical element of bathroom functionality and design. While pre-fabricated mirrors are readily available, constructing a custom mirror allows for personalization, cost savings, and the satisfaction of a DIY project. This article provides a detailed guide to building a bathroom mirror, covering material selection, construction techniques, and installation considerations. The process, while requiring some skill and planning, is achievable for the average homeowner with basic tools and a commitment to precision.
The decision to undertake a DIY mirror project often stems from a desire for specific dimensions, unique aesthetics, or cost-effectiveness. Standard mirrors may not perfectly fit a particular space, necessitating modifications or compromises. Building a mirror from scratch allows for complete control over size, shape, frame style, and even embellishments. Furthermore, sourcing materials independently can sometimes be more economical than purchasing a ready-made alternative, particularly when incorporating high-end frames or custom features.
Key Point 1: Material Selection
The foundation of any successful mirror project lies in the careful selection of materials. The primary components include the mirror glass itself, the backing material, the frame (if desired), adhesive, and hanging hardware. Each of these elements plays a crucial role in the mirror's durability, appearance, and ease of installation.
Mirror Glass: The mirror glass is arguably the most important component. It’s crucial to select a high-quality mirror glass suitable for bathroom environments. Bathroom mirrors are exposed to humidity and temperature fluctuations, which can damage or degrade lower-quality glass over time. Look for mirror glass with a durable silver backing and a protective coating to resist moisture damage. The thickness of the mirror glass also affects its durability and reflectivity. For smaller mirrors, 1/8-inch glass may suffice, but for larger mirrors, 1/4-inch glass is recommended for added strength and reduced distortion.
Backing Material: The backing material provides support and protection for the mirror glass. It also serves as a surface for attaching hanging hardware. Common backing materials include hardboard, plywood, or MDF (Medium-Density Fiberboard). The choice of backing material depends on the size of the mirror and the desired level of moisture resistance. MDF is a cost-effective option, but it is susceptible to moisture damage if not properly sealed. Plywood offers better moisture resistance but can be more expensive. Hardboard is a good compromise, offering a balance of cost-effectiveness and durability. Regardless of the material chosen, it is essential to seal the edges and back of the backing material with a waterproof sealant to prevent moisture penetration.
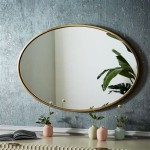
Frame Material (Optional): If a framed mirror is desired, the selection of frame material is a critical aesthetic decision. Wood is a popular choice, offering a wide range of styles and finishes. Different types of wood, such as pine, oak, or maple, can be used, each with its own unique grain pattern and characteristics. Metal frames, such as aluminum or steel, offer a more modern and industrial look. Composite materials, such as PVC or polyurethane, are also available and offer excellent moisture resistance, making them ideal for bathroom environments. The frame material should be chosen based on the overall bathroom design and the desired aesthetic. Consider the color, texture, and finish of the frame material to ensure it complements the other elements in the bathroom.
Adhesive: Selecting the correct adhesive is paramount for securely bonding the mirror glass to the backing material. Specialized mirror adhesives are designed to be non-corrosive and chemically compatible with the silver backing of the mirror. These adhesives typically come in tube form and are applied in a bead pattern across the back of the mirror. Avoid using general-purpose adhesives, as they may damage the mirror's reflective surface or weaken over time. Read the adhesive manufacturer's instructions carefully to ensure proper application and curing.
Hanging Hardware: The hanging hardware must be suitable for the weight of the finished mirror and the type of wall it will be mounted on. Options include D-rings, wire, or specialized mirror hanging clips. D-rings are typically attached to the back of the backing material with screws and are used with picture hanging wire. Wire is a simple and inexpensive option, but it can be less stable than other hanging methods. Mirror hanging clips are designed to grip the edges of the mirror and provide a secure and flush mount to the wall. The choice of hanging hardware depends on the size and weight of the mirror, as well as the desired aesthetic.
Key Point 2: Construction Techniques
Once the materials have been selected, the next step is to assemble the mirror. This process involves cutting the materials to size, bonding the mirror glass to the backing material, and attaching the frame (if applicable). Accurate measurements and careful execution are essential for a professional-looking result.
Cutting the Materials: Precise measurements are critical. Use a measuring tape, a square, and a pencil to accurately mark the cutting lines on the mirror glass, backing material, and frame material. For the mirror glass, it's recommended to have it professionally cut by a glass shop. Attempting to cut mirror glass without specialized tools and expertise can be dangerous and result in breakage. The backing material can be cut using a circular saw, jigsaw, or table saw. Always wear safety glasses and a dust mask when cutting wood or MDF. The frame material can be cut using a miter saw or hand saw, depending on the desired angle and complexity of the frame design.
Bonding the Mirror Glass to the Backing Material: Before applying the adhesive, clean the back of the mirror glass and the front of the backing material with a glass cleaner and a lint-free cloth. This will ensure a strong bond between the two surfaces. Apply the mirror adhesive in a consistent bead pattern across the back of the mirror glass. Avoid applying adhesive too close to the edges, as it may squeeze out when the mirror is pressed onto the backing material. Carefully position the mirror glass onto the backing material, ensuring that it is centered and aligned correctly. Apply gentle and even pressure to the mirror glass to ensure good contact with the adhesive. Secure the mirror with clamps or weights until the adhesive has fully cured, following the manufacturer's instructions for drying time.
Assembling the Frame (Optional): If a framed mirror is desired, the frame must be assembled before attaching it to the mirror. Mitered corners are a common frame design, requiring precise 45-degree cuts. Assemble the frame using wood glue and clamps, ensuring that the corners are square and tight. Once the glue has dried, reinforce the corners with screws or nails for added strength. The frame can then be attached to the mirror using wood glue, screws, or nails. Ensure that the frame is properly aligned with the mirror and that the fasteners are countersunk to prevent them from protruding.
Finishing Touches: After the mirror has been assembled, clean the reflective surface with a glass cleaner and a lint-free cloth. Inspect the edges and corners for any imperfections or gaps. Fill any gaps with caulk or wood filler and sand smooth. Apply a protective sealant to the edges of the backing material and the frame to prevent moisture penetration. Attach the hanging hardware to the back of the backing material, ensuring that it is securely fastened and properly aligned.
Key Point 3: Installation Considerations
Proper installation is crucial for ensuring the safety and stability of the bathroom mirror. Before installation, assess the wall structure to determine the appropriate hanging method and hardware. Consider the location of studs, plumbing, and electrical wiring to avoid any potential hazards. It's also important to comply with local building codes and regulations regarding mirror installation.
Wall Assessment: Determine the type of wall it will be mounted on (e.g., drywall, plaster, concrete). Drywall is the most common wall type in residential bathrooms, but it is not strong enough to support heavy mirrors without proper anchoring. Locate the wall studs using a stud finder. The studs provide the strongest support for hanging heavy objects. If the mirror cannot be easily aligned with the studs, use drywall anchors to provide additional support. There are various types of drywall anchors available, each with its own weight capacity. Choose anchors that are appropriate for the weight of the mirror.
Hanging Methods: The hanging method will depend on the type of hanging hardware and the wall structure. If using D-rings and wire, attach the D-rings to the back of the backing material with screws. Ensure that the screws are long enough to penetrate the backing material securely, but not so long that they protrude through the front. Thread the wire through the D-rings and adjust the length to achieve the desired hanging height. Hang the mirror on a hook or nail that is securely anchored to the wall. If using mirror hanging clips, attach the clips to the wall with screws, ensuring that they are properly aligned and spaced. Carefully slide the mirror into the clips, ensuring that it is securely held in place.
Safety Precautions: Prioritize safety throughout the installation process. Wear safety glasses to protect eyes from debris. Use a level to ensure that the mirror is hung straight. Avoid over-tightening screws, as this can damage the wall or the hanging hardware. Enlist the help of another person to lift and position the mirror, especially if it is large or heavy. If drilling into walls, be aware of the location of plumbing and electrical wiring to avoid causing any damage or injury. Turn off the power to any electrical circuits in the area before drilling. Consult a professional if unsure about any aspect of the installation process.
Final Inspection: Once the mirror is installed, inspect it carefully to ensure that it is securely mounted and properly aligned. Check for any wobbling or instability. If the mirror is not level, adjust the hanging hardware or shims as needed. Clean the reflective surface with a glass cleaner and a lint-free cloth. Ensure that the area around the mirror is clean and free of debris. Enjoy the newly installed custom bathroom mirror.

Mirror Frame Diy How To Update A Basic Bathroom Our Faux Farmhouse

How To Frame A Mirror

How To Frame Out That Builder Basic Bathroom Mirror For 20 Or Less

20 Creative Diy Mirror Frame Ideas To Inspire Your Next Project Bathroom Mirrors Makeover

How To Build A Vanity Mirror Ana White

Diy Stick On Mirror Frame Sawdust Sisters

How To Make An Easy Diy Bathroom Mirror Frame Momhomeguide Com

Diy Bathroom Mirror Frame Without Removing Clips Her Happy Home

How To Create A Diy Mirror Frame For Your Bathroom

How To Frame A Bathroom Mirror Easy Casa Watkins Living