DIY Crushed Glass Mirror: A Step-by-Step Guide
Creating a crushed glass mirror is a visually striking and relatively straightforward DIY project. It allows for customization in terms of size, shape, and color palette, resulting in a unique decorative piece. This article provides a comprehensive guide to crafting a crushed glass mirror, outlining the necessary materials, tools, and steps involved in the process.
Materials and Tools Required
The success of a crushed glass mirror project hinges on the availability of the appropriate materials and tools. Failure to procure the right items can lead to frustrations and potentially compromise the final product. A detailed list is provided below:
Mirror Blank: A mirror blank serves as the foundation for the project. The size and shape of the mirror blank will determine the dimensions and aesthetics of the finished mirror. Options range from small, circular mirrors suitable for accent pieces to large, rectangular mirrors designed to serve as focal points in a room. Consider purchasing a beveled edge mirror for added elegance.
Crushed Glass: Crushed glass is the defining element of this project. It is available in a wide assortment of colors, sizes, and textures. Options range from finely ground glass resembling sand to larger, irregularly shaped pieces that catch the light more dramatically. Consider a mix of sizes and types for added visual interest. Safety is paramount: tempered glass is recommended as it breaks into small, relatively harmless pieces compared to non-tempered glass.
Epoxy Resin: Epoxy resin functions as the adhesive that binds the crushed glass to the mirror blank. It is crucial to select a clear epoxy resin to ensure that the color and texture of the crushed glass remain visible. Read the manufacturer's instructions carefully regarding mixing ratios and curing times. A resin specifically designed for glass adhesion is ideal.
Mixing Cups and Sticks: Accurate measurement and thorough mixing of the epoxy resin are critical for proper curing and adhesion. Use disposable mixing cups to prevent contamination and make cleanup easier. Wooden sticks or plastic spatulas are suitable for stirring the resin components together.
Gloves and Mask: Safety precautions are indispensable when working with epoxy resin and crushed glass. Wear disposable gloves to protect the skin from irritation and potential allergic reactions. A dust mask or respirator is recommended to avoid inhaling dust particles from the crushed glass and fumes from the epoxy resin, particularly in poorly ventilated areas.
Eye Protection: Safety glasses or goggles are crucial to protect the eyes from flying debris during the application of the crushed glass. Accidental splashes of epoxy resin can also cause significant eye irritation, necessitating the use of eye protection.
Spreader or Trowel: A spreader or trowel is useful for spreading the epoxy resin evenly across the surface of the mirror blank. This ensures uniform adhesion of the crushed glass and prevents pooling or uneven distribution of the resin.
Painter's Tape (Optional): Painter's tape can be used to create a border around the edge of the mirror to prevent the crushed glass from spilling over onto the back. This is particularly useful for beginners and those seeking a clean, professional finish.
Heat Gun (Optional): A heat gun can be used to remove air bubbles from the epoxy resin after it has been poured. This results in a smoother, more flawless finish. Exercise caution when using a heat gun, as excessive heat can damage the epoxy resin or even the mirror blank.
Level: A level is useful for ensuring that the mirror is mounted properly and hangs straight. This is particularly important for larger mirrors that are intended to be hung on a wall.
Step-by-Step Instructions
The process of creating a crushed glass mirror involves a series of carefully executed steps. Adhering to these steps will increase the likelihood of a successful and aesthetically pleasing final product.
Preparation: Begin by thoroughly cleaning the mirror blank with a glass cleaner and a lint-free cloth. This removes any dust, dirt, or fingerprints that could interfere with the adhesion of the epoxy resin. Allow the mirror blank to dry completely before proceeding.
Applying Painter's Tape (Optional): If desired, apply painter's tape around the edge of the mirror to create a clean border. Ensure that the tape is securely adhered to the glass to prevent epoxy resin from seeping underneath.
Mixing the Epoxy Resin: Carefully measure and mix the two components of the epoxy resin according to the manufacturer's instructions. Pay close attention to the recommended mixing ratio, as incorrect proportions can result in incomplete curing or a weak bond. Stir the resin components thoroughly for the specified amount of time, ensuring that there are no unmixed streaks or swirls.
Pouring the Epoxy Resin: Slowly pour the mixed epoxy resin onto the surface of the mirror blank. Use a spreader or trowel to distribute the resin evenly across the entire surface. Ensure that there are no areas where the resin is too thick or too thin.
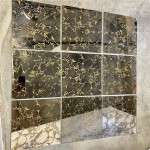
Applying the Crushed Glass: Sprinkle the crushed glass onto the wet epoxy resin, covering the entire surface completely. Apply the glass generously, ensuring that there are no gaps or bare spots. Press the crushed glass gently into the resin to ensure good adhesion. For a more layered effect, consider applying different colors and sizes of crushed glass in stages.
Removing Air Bubbles (Optional): If desired, use a heat gun to remove any air bubbles from the epoxy resin. Hold the heat gun a few inches away from the surface of the mirror and move it slowly and evenly across the entire area. Avoid overheating the resin, as this can cause it to yellow or crack.
Curing the Epoxy Resin: Allow the epoxy resin to cure completely according to the manufacturer's instructions. This typically takes between 24 and 72 hours, depending on the type of resin used and the ambient temperature. During the curing process, keep the mirror in a dust-free environment to prevent debris from settling on the surface.
Removing Painter's Tape (Optional): Once the epoxy resin has fully cured, carefully remove the painter's tape from the edge of the mirror. Use a sharp blade or utility knife to score the edge of the tape before peeling it off to prevent the epoxy resin from chipping or cracking.
Cleaning the Mirror: Clean the finished mirror with a glass cleaner and a lint-free cloth to remove any dust, fingerprints, or residue. Inspect the surface carefully for any imperfections or loose pieces of crushed glass. If necessary, apply a small amount of epoxy resin to secure any loose glass pieces.
Design Considerations and Variations
The crushed glass mirror project offers ample opportunities for creative expression. Varying the design elements can result in mirrors that complement diverse aesthetic preferences.
Color Palette: The choice of crushed glass colors significantly impacts the overall look of the mirror. Consider using a monochromatic color scheme for a sophisticated and minimalist aesthetic. Alternatively, a vibrant and colorful palette can create a playful and eye-catching effect. Metallic tones, such as gold, silver, or copper, can add a touch of elegance and glamour. Experimenting with different color combinations is encouraged.
Glass Size and Texture: The size and texture of the crushed glass contribute to the visual appeal of the mirror. Using a mix of different sizes and textures can create depth and dimension. Larger pieces of glass will reflect more light and create a more dramatic effect, while smaller pieces will provide a more subtle and textured look. Consider using iridescent or dichroic glass for added sparkle and shimmer.
Shape and Arrangement: The arrangement of the crushed glass can also be customized to create unique designs. Consider creating a gradient effect by gradually transitioning from one color to another. Alternatively, you can create a mosaic-like pattern by arranging the glass in geometric shapes or abstract designs. Using stencils or templates can help to create more intricate and precise designs. You can also arrange the crushed glass to form a frame or border around the mirror, leaving the center clear. This design choice provides a clean and modern aesthetic.
Mirror Shape: The shape of the mirror blank also influences the overall design. Experiment with different shapes, such as circles, squares, rectangles, or even custom-cut shapes, to create a mirror that complements your existing décor. Consider using a mirror with a beveled edge for a more polished and refined look.
Adding Embellishments: Incorporating other embellishments, such as beads, sequins, or shells, can add further visual interest to the crushed glass mirror. These embellishments can be strategically placed among the crushed glass to create focal points or to enhance the overall design. Ensure that any embellishments used are compatible with the epoxy resin and will adhere properly to the mirror surface.
Resin Coloration: While clear epoxy resin is typically preferred to showcase the glass, experimentation with colored resin is possible. Pigments designed for epoxy resin can be added to create a translucent or opaque background that complements the crushed glass. This can open up a range of design possibilities, allowing for the creation of truly unique and personalized mirrors.

Diy Crushed Glass Mirror How To Make

How To Make Crushed Mirror Glass

How To Make Your Own Crushed Glass Mirror Diy

How To Make Crushed Mirror Glass 11 Steps Instructables

Diy Crushed Glass Mirror How To Make

Pin On Diy Home Crafts

How To Make Your Own Crushed Glass Mirror Diy


How To Make Your Own Crushed Glass Mirror Diy

10 Magical Space Decorating Ideas To Reuse Broken Mirror Proud Home Decor