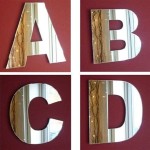
Decorative Mirror Trim Kits: Enhancing Aesthetics and Adding Value
Decorative mirror trim kits provide a readily available solution for upgrading the appearance of plain, frameless mirrors. These kits typically comprise pre-cut strips of various materials, such as wood, metal, or synthetic polymers, designed to adhere to the edges of the mirror, transforming it into a more stylish and visually appealing focal point. The use of mirror trim kits is a cost-effective method compared to replacing the entire mirror with a framed alternative, offering a convenient and customizable approach to interior design.
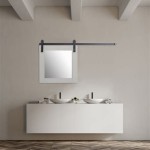
The appeal of decorative mirror trim kits lies in their versatility and ease of installation. They cater to a wide range of aesthetic preferences, with options ranging from sleek, modern designs to ornate, traditional styles. This adaptability makes them suitable for various rooms in the house, including bathrooms, bedrooms, living rooms, and hallways. Furthermore, the relative simplicity of the installation process allows homeowners and renters alike to enhance their living spaces without requiring professional assistance.
A primary advantage of using decorative mirror trim kits is the ability to personalize the appearance of existing mirrors. Instead of being limited to the standard appearance of a frameless mirror, individuals can select a trim that complements their existing décor, adding a touch of individuality to the room. This ability to customize extends to the choice of materials, colors, and finishes, allowing for seamless integration with the overall design scheme.
Key Considerations When Choosing a Mirror Trim Kit
Before purchasing a decorative mirror trim kit, several factors warrant careful consideration. These include the type of material, the style and design, the dimensions of the mirror, and the method of installation. Evaluating these aspects ensures that the chosen kit aligns with both the aesthetic goals and the practical requirements of the project.
The choice of material has a significant impact on both the appearance and the durability of the trim. Wood trim, for instance, offers a classic and warm aesthetic, but may require additional sealing or painting to protect it from moisture, especially in bathrooms. Metal trim, such as brushed nickel or polished chrome, provides a modern and sleek look and is generally more resistant to moisture. Synthetic polymers, like PVC or polystyrene, offer a lightweight and moisture-resistant alternative that is often available in a wider range of colors and finishes. The material choice should therefore be tailored to the specific environment and the desired aesthetic.
The style and design of the trim should complement the existing décor of the room. Simple, minimalist designs are well-suited to contemporary spaces, while more ornate or decorative trims may be more appropriate for traditional or vintage-inspired interiors. The color and finish of the trim should also harmonize with the surrounding elements, such as the wall color, fixtures, and furniture. It is advisable to consider the overall design scheme of the room and select a trim that enhances its existing aesthetic rather than clashing with it.
Accurate measurement of the mirror is crucial for selecting the correct size of trim kit. Most kits are designed to be cut to size, but it is important to ensure that the available length is sufficient to cover all four edges of the mirror. Precise measurements will also facilitate a clean and professional-looking installation. Double-checking these dimensions before making a purchase can prevent the frustration of discovering that the kit is either too short or excessively long.
The method of installation is another key consideration. Most decorative mirror trim kits utilize adhesive backing for easy application. However, the strength and durability of the adhesive can vary. It is essential to select a kit with an adhesive that is appropriate for the surface of the mirror and the weight of the trim. Some kits may also require additional adhesive or mechanical fasteners, such as screws or nails, for added security. Reviewing the installation instructions carefully and gathering the necessary tools and materials beforehand will ensure a smooth and successful installation process.
Types of Mirror Trim Materials and Their Characteristics
The material used in a decorative mirror trim kit significantly influences its appearance, durability, and suitability for different environments. Understanding the characteristics of various materials allows for informed decision-making and ensures that the selected trim meets the specific needs of the project.
Wood trim offers a classic and versatile aesthetic, lending warmth and natural beauty to any space. It can be easily painted or stained to match existing décor. However, wood is susceptible to moisture damage and may require sealing or a water-resistant finish, especially in bathrooms or other humid environments. Different types of wood, such as pine, oak, or maple, offer varying degrees of durability and aesthetic appeal. For example, hardwood trim provides greater resistance to scratches and dents than softwood trim. The cost of wood trim can also vary depending on the type of wood and the complexity of the design.
Metal trim, such as aluminum, stainless steel, or brass, provides a sleek and modern aesthetic. It is highly durable and resistant to moisture, making it suitable for bathrooms and other high-moisture environments. Metal trim is typically available in a variety of finishes, such as brushed nickel, polished chrome, or oil-rubbed bronze, allowing for seamless integration with existing fixtures and hardware. However, metal trim can be more expensive than other options and may require specialized tools for cutting and installation. It is also important to choose a metal that is resistant to corrosion or tarnishing, especially in damp environments.
Synthetic polymers, such as PVC or polystyrene, offer a lightweight and moisture-resistant alternative to wood or metal trim. These materials are typically less expensive and easier to cut and install. They are available in a wide range of colors and finishes, including wood-grain patterns that mimic the appearance of natural wood. Synthetic polymers are also resistant to rot, insects, and mold, making them a durable and low-maintenance option. However, they may not be as aesthetically pleasing as natural wood or metal and may not be suitable for high-end or luxury interiors.
Glass or acrylic trim offers a unique and elegant aesthetic. Glass trim can be clear, frosted, or colored, adding a touch of sophistication to any mirror. Acrylic trim is lighter and more shatter-resistant than glass, making it a safer option for households with children or pets. Both glass and acrylic trim are resistant to moisture and easy to clean. However, they can be more expensive than other options and may require specialized tools and techniques for installation. It is also important to handle glass and acrylic trim with care to avoid scratches or breakage.
Installation Techniques and Best Practices for Mirror Trim Kits
Proper installation is critical for ensuring that a decorative mirror trim kit looks professional and lasts for years to come. Careful preparation, precise measurements, and the use of appropriate tools and techniques are essential for a successful installation.
Before beginning the installation process, it is important to thoroughly clean the surface of the mirror. Use a glass cleaner and a lint-free cloth to remove any dust, dirt, or fingerprints. This will ensure that the adhesive backing of the trim adheres properly to the mirror surface. Allow the mirror to dry completely before proceeding to the next step. Failure to properly clean the mirror can result in poor adhesion and a less durable installation.
Accurate measurement and cutting of the trim are essential for a professional-looking finish. Use a measuring tape and a pencil to mark the desired length of each piece of trim. Use a miter saw or a hand saw with a miter box to cut the trim at a 45-degree angle for the corners. Ensure that the cuts are clean and precise to avoid gaps or uneven edges. It is advisable to make slightly longer cuts initially and then gradually trim the pieces down to the exact size, allowing for fine adjustments.
When applying the trim to the mirror, start with one corner and work your way around the perimeter. Peel off the protective backing from the adhesive and carefully align the trim with the edge of the mirror. Press firmly to ensure that the adhesive makes good contact with the mirror surface. Use a level to ensure that the trim is straight and even. If necessary, use clamps or masking tape to hold the trim in place while the adhesive sets. Avoid applying excessive pressure, which could damage the mirror or the trim. It is recommended to allow the adhesive to cure for the recommended time specified by the manufacturer before handling the mirror extensively.
For added security, consider using additional adhesive or mechanical fasteners, such as screws or nails. This is particularly important for larger or heavier trim kits. Apply a thin bead of construction adhesive to the back of the trim before attaching it to the mirror. Use small screws or nails to further secure the trim in place, being careful not to overtighten them and damage the mirror. Countersink the screws or nails and fill the holes with wood filler or caulk for a seamless finish. Ensure that the fasteners are appropriate for the type of material used in the trim and the mirror.
Once the trim is installed, inspect it carefully for any gaps or imperfections. Fill any gaps between the trim and the mirror with caulk or wood filler. Use a damp cloth to wipe away any excess caulk or filler. If the trim is unfinished wood, apply a sealant, primer, and paint or stain to protect it from moisture and enhance its appearance. Choose a paint or stain that complements the existing décor of the room. Allow the finish to dry completely before handling the mirror. By following these installation techniques and best practices, it is possible to achieve a professional-looking and durable decorative mirror trim that enhances the aesthetic appeal of any room.

Zenna Home Decorative Mirror Framing Kit With Beveled Edges 48 X 36 In Espresso Com

Zenna Home Decorative Mirror Framing Kit With Beveled Edges 48 X 36 In Espresso Com

Mirror Trim Ideas For Your Bathroom Mirrormate

Mirredge 60 In X 1 5 Acrylic Framing Installation Kit 14111 The Home Depot

Avery Black Mirror Frame Kit Self Adhesive My

Mirredge 60 In X 1 5 Cherry Walnut Decorative Framing Installation Kit 54112 The Home Depot

Matte Black Mirror Frames Bathroom Trim Mirrormate

Zenna Home Decorative Mirror Framing Kit With Beveled Edges 42 X 36 In Silver Com

Zenna Home Decorative Mirror Framing Kit With Beveled Edges 30 X 36 In White Com

Espresso Mirror Frame Frames For Bathroom Wall Mirrors Mirrormate