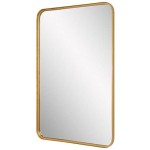
DIY Gold Mercury Glass Mirror: A Comprehensive Guide
Creating a gold mercury glass mirror at home is a rewarding project that allows for customization and achieves a unique aesthetic. This article provides a detailed guide to replicating the antique look of mercury glass, focusing on a gold-toned finish suitable for mirrors. The process involves layering specific materials and techniques to mimic the characteristic speckled and aged appearance of genuine mercury glass, without the use of actual mercury, which is hazardous and illegal.
The appeal of mercury glass lies in its vintage charm and reflective qualities, which add depth and visual interest to any space. Gold mercury glass, in particular, brings a touch of warmth and elegance, complementing various interior design styles, from traditional to contemporary. By following these instructions, individuals can create custom mirrors that reflect their personal style and enhance their home décor.
Key Point 1: Materials and Preparation
The foundation of any successful DIY project lies in proper preparation and the selection of quality materials. Before commencing, gather all necessary supplies to ensure a smooth and efficient workflow. The primary components for creating a gold mercury glass mirror are a glass mirror, Krylon Looking Glass spray paint, Krylon Gold spray paint (or a similar metallic gold paint), vinegar, water, paper towels, a spray bottle, and a well-ventilated workspace. The mirror should be clean and free of any dust or debris. Isopropyl alcohol can be used to thoroughly clean the surface, ensuring optimal adhesion of the subsequent layers of paint.
The choice of mirror is critical. The thickness of the glass impacts both the visual appeal and structural integrity of the finished product. Thicker glass offers a more substantial and premium feel. The size and shape of the mirror should be determined based on the intended application and aesthetic preference. Mirrors can be purchased pre-cut in various shapes, or a glass shop can cut custom sizes.
Krylon Looking Glass spray paint is the cornerstone of this technique, producing a reflective, mirrored surface. This product is specially formulated to create a convincing mirrored effect when applied to glass. Krylon Gold or a comparable metallic gold spray paint is used to impart the desired gold hue to the mercury glass effect. It is crucial to select a gold paint that complements the overall décor and achieves the desired level of warmness.
Vinegar and water are combined in a spray bottle to create an etching solution that will delicately distress the mirrored coating, replicating the characteristic spots and imperfections found in genuine mercury glass. The ratio of vinegar to water can be adjusted to control the intensity of the distressing effect. Paper towels are essential for blotting and manipulating the etching solution, further contributing to the unique variations in the finish.
A well-ventilated workspace is paramount due to the use of spray paints. Adequate ventilation prevents the accumulation of harmful fumes and ensures a safe working environment. An open-air space or a room with a ventilation system is recommended. It is also advisable to wear a respirator mask to minimize exposure to paint fumes.
Key Point 2: Application Process and Technique
The application process involves several layers of paint and distressing treatments, each contributing to the final mercury glass effect. The first step is to apply a thin, even coat of Krylon Looking Glass spray paint to the entire surface of the mirror. It is essential to avoid applying the paint too thickly, as this can lead to drips and an uneven finish. Multiple thin coats are preferable to a single thick coat, allowing each layer to dry properly before applying the next.
After the initial layer of Looking Glass paint has dried completely (typically 15-30 minutes, depending on environmental conditions), apply a second coat, again ensuring even coverage. Observe the manufacturer's instructions for optimal drying times. The goal is to achieve a consistent, reflective base upon which the gold and distressing effects will be built.
Next, apply a thin, even coat of Krylon Gold spray paint over the Looking Glass paint. Avoid completely obscuring the reflective base. The intention is to subtly tint the mirrored surface with a golden hue, creating the characteristic warmth of gold mercury glass. Allow the gold paint to dry thoroughly.
The distressing process is what truly transforms the mirrored surface into a convincing mercury glass replica. In the spray bottle, combine equal parts vinegar and water. Lightly mist the surface of the mirror with the vinegar and water solution. Immediately after spraying, use a paper towel to blot and dab the solution, creating irregular spots and patterns. The vinegar solution will gently etch away the mirrored coating, revealing glimpses of the glass beneath, simulating the aged and speckled appearance of antique mercury glass.
The degree of distressing can be controlled by adjusting the intensity and duration of the blotting process. Experiment with different blotting techniques to achieve the desired effect. Some areas can be blotted more heavily, while others are left relatively untouched, creating visual variation and depth. If too much of the mirrored coating is removed, another thin layer of Looking Glass paint can be applied and the distressing process repeated.
Once the distressing is complete and the vinegar solution has dried completely, apply a final thin layer of Looking Glass paint to seal the surface and further enhance the reflective quality. This layer helps to blend the distressed areas and create a more cohesive and convincing mercury glass effect. Allow the final layer of paint to dry thoroughly before handling or mounting the mirror.
Key Point 3: Refinement and Finishing Touches
After the paint has completely dried, inspect the surface of the mirror for any imperfections or inconsistencies. Minor imperfections, such as small drips or uneven areas, can be gently buffed out with a soft cloth or a fine-grit sandpaper. However, exercise caution to avoid scratching the painted surface.
If necessary, additional layers of Looking Glass paint, gold paint, or distressing can be applied to refine the finish and achieve the desired aesthetic. This iterative process allows for fine-tuning and customization, ensuring that the final product meets individual preferences. Remember to allow each layer of paint to dry completely before proceeding with the next.
To protect the finished mercury glass surface and prevent damage, consider applying a clear coat sealant. A sealant will provide a protective barrier against scratches, moisture, and other environmental factors. Choose a clear coat sealant specifically designed for use on painted surfaces. Apply the sealant in thin, even coats, following the manufacturer's instructions.
The back of the mirror can be finished with a protective backing material, such as cardboard or felt, to prevent scratching or damage to the wall when the mirror is mounted. Attach the backing material securely using adhesive or fasteners. Appropriate hanging hardware should be installed based on the weight and size of the mirror. Ensure that the hardware is capable of supporting the mirror safely and securely.
The completed gold mercury glass mirror can be incorporated into various décor schemes. It can be hung on a wall, leaned against a mantelpiece, or used as a decorative element on a tabletop. The reflective qualities of the mirror will enhance the lighting and create a sense of spaciousness in any room. The gold finish will add a touch of warmth and elegance, complementing a variety of color palettes and design styles.
Proper care and maintenance will ensure the longevity of the gold mercury glass mirror. Avoid exposing the mirror to excessive moisture or harsh cleaning chemicals. Clean the surface regularly with a soft, dry cloth to remove dust and fingerprints. For more stubborn stains, use a mild glass cleaner and a lint-free cloth. Avoid using abrasive cleaners or scouring pads, as these can damage the painted surface. With proper care, the gold mercury glass mirror will remain a beautiful and cherished decorative accent for years to come.

Diy Mercury Glass Gilded Mirror Made From Old Photo Frames

Diy Mercury Glass Gilded Mirror Made From Old Photo Frames

Diy Mercury Glass Gilded Mirror Made From Old Photo Frames

Use This Faux Mercury Glass Technique To Make A Vintage Style Mirror My Crappy House

Diy Mercury Glass Gilded Mirror Made From Old Photo Frames

Diy Mercury Glass 100 Things 2 Do

Flipping Houses Home Renovation In Silicon Valley

Diy Mercury Glass Gilded Mirror Made From Old Photo Frames

How To Antique A Mirror Tutorial Jenna Sue Design

Diy Mercury Glass 100 Things 2 Do

