How Do You Put a Frame Around Bathroom Mirrors?
Adding a frame to a bathroom mirror can dramatically elevate its aesthetic appeal, transforming a functional element into a stylish focal point. Whether you're seeking to enhance the design of your existing mirror or want to create a custom look, framing provides a versatile solution. This article will guide you through the process of putting a frame around a bathroom mirror, encompassing essential steps and considerations.
Selecting the Right Frame
The first step in framing a bathroom mirror is selecting the right frame to complement your bathroom's style and decor. There are numerous options available, and the chosen frame should harmonize with the overall design theme.
Material: Wood, metal, and plastic are common frame materials. Wood offers warmth and versatility, while metal provides a modern and sleek look. Plastic provides a budget-friendly option that can still be stylish.
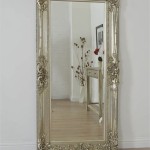
Style: Consider the style of your bathroom. For traditional settings, ornate, detailed frames with intricate carvings might be appropriate, while minimalist spaces might benefit from simple, clean-lined frames.
Color: The frame's color should complement the bathroom's existing color scheme. Neutrals like black, white, and gray offer versatility, while bold colors can add a pop of personality.
Size: Ensure the frame's dimensions are appropriate for the mirror. Too large a frame can overwhelm the mirror, while a small frame might look disproportionate.
Preparing the Mirror and Frame
Once the frame is selected, prepare the mirror and frame for installation. This involves cleaning the surface of both components to ensure a secure bond.
Clean the Mirror: Use a mild glass cleaner to remove any dirt, dust, or residue from the mirror's surface. Thoroughly dry the mirror with a soft cloth or paper towel.
Clean the Frame: Wipe down the frame's surface with a damp cloth and mild detergent. Allow the frame to dry completely before proceeding.
Installation Techniques
Several methods can be employed to attach a frame to a bathroom mirror. The most common techniques are described below:
Adhesive
Adhesive is a practical and easy-to-use method for attaching a frame to a mirror. This technique is suitable for lightweight frames or frames that do not require a permanent bond.
1. Apply a bead of adhesive along the back of the frame, ensuring it's evenly distributed. 2. Carefully position the frame against the mirror, aligning it according to your preference. 3. Gently press the frame against the mirror, ensuring a secure bond. 4. Allow the adhesive to dry completely before handling the mirror. This drying time will vary depending on the specific adhesive, so consult the product's instructions.
Mirror Clips
Mirror clips are metal fasteners designed to secure a frame to a mirror. This method offers a more robust attachment and is suitable for heavier frames or frames that require a permanent bond.
1. Mark the locations for the mirror clips on the back of the frame. 2. Drill pilot holes at the marked locations using a drill bit slightly smaller than the diameter of the clips. 3. Secure the clips to the frame using screws or rivets. 4. Carefully position the frame against the mirror and align it as desired. 5. Gently press the clips into the mirror, ensuring they are firmly secured.
Hanging Hardware
If the mirror is being hung on a wall, consider using hanging hardware to attach the framed mirror to the wall. This method is suitable for heavier framed mirrors and ensures a stable and secure hanging position.
1. Install a hanging wire or D-rings on the back of the frame, ensuring the hanging mechanism is centered. 2. Secure the hanging wire or D-rings using screws or rivets. 3. Attach a hook or picture wire to the wall in a position that allows the framed mirror to hang securely. 4. Carefully hang the framed mirror on the hook or fasten it to the picture wire.

How To Frame Out That Builder Basic Bathroom Mirror For 20 Or Less

How To Frame A Bathroom Mirror For Just 10

Mirror Frame Diy How To Update A Basic Bathroom Our Faux Farmhouse

How To Frame A Mirror

Diy Stick On Mirror Frame Sawdust Sisters

How To Install A Mirrorchic Bathroom Mirror Frame Momhomeguide Com

Diy Bathroom Mirror Frame With Molding The Happier Homemaker

The Kids Bathroom Mirror Gets Framed House Of Hepworths

Easy Diy Tutorial Adding Trim Around A Giant Mirror For Ers

Diy Bathroom Mirror Frame Without Removing Clips Her Happy Home


