How To Frame A Frameless Mirror
Frameless mirrors offer a clean, minimalist aesthetic, but sometimes a frame is desired to add personality, complement existing décor, or protect the mirror's edges. Framing a frameless mirror is a manageable project that can significantly enhance its appearance. This article provides a detailed guide on how to frame a frameless mirror, covering various frame options, necessary tools, and a step-by-step process to achieve a professional-looking result.
Before commencing the framing process, careful consideration should be given to the desired frame style, material, and dimensions. The frame should not only be visually appealing but also appropriately sized to accommodate the mirror and any necessary mounting hardware. Furthermore, the installation location plays a crucial role in determining the suitable framing method and materials.
Key Considerations Before Starting
Prior to beginning the actual framing process, it’s important to consider a few key factors. These include the mirror’s size and weight, the type of wall it will be mounted on, and the desired aesthetic. A thorough assessment of these elements will ensure a successful and safe framing project.
The size and weight of the mirror directly impact the choice of frame material and mounting method. Larger and heavier mirrors require sturdier frames and more robust mounting solutions. Consider the wall type - drywall, plaster, or masonry - as this will influence the type of anchors and screws needed to securely attach the framed mirror.
The desired aesthetic is a subjective but important factor. Decide whether you prefer a modern, rustic, traditional, or any other particular style. This will guide your choice of frame material (wood, metal, etc.), finish (painted, stained, etc.), and overall design. It’s a good idea to gather inspiration from interior design magazines, online resources, or home décor stores to visualize the final result.
Finally, remember to account for any existing hardware or features around the mirror’s location, such as light fixtures, outlets, or plumbing pipes. This will ensure the frame does not obstruct or interfere with these elements.
Materials and Tools Required
Successfully framing a frameless mirror requires the appropriate materials and tools. The following list outlines the essentials, with explanations of their use and importance.
Frame Material: The choice of frame material will significantly impact the look and feel of the finished product. Wood is a popular option due to its versatility and ease of workability. Metal frames offer a sleek, modern aesthetic and are known for their durability. Composite materials, such as polystyrene or MDF, provide a cost-effective alternative that can be easily painted or finished. The quantity of frame material will depend on the mirror’s dimensions; ensure sufficient material is purchased, allowing for miter cuts and potential errors.
Measuring Tape: Accurate measurements are paramount for a well-fitted frame. A high-quality measuring tape will enable precise cuts and ensure the frame pieces align correctly.
Miter Saw or Miter Box and Hand Saw: A miter saw is ideal for making precise 45-degree cuts for the corners of the frame. A miter box and hand saw can also be used, although they require more manual effort and attention to detail. The accuracy of the miter cuts is crucial for a seamless frame.
Wood Glue or Construction Adhesive: Wood glue is suitable for bonding wooden frame pieces, while construction adhesive can be used for bonding various materials, including wood, metal, and composite materials. Choose an adhesive appropriate for the chosen frame material and follow the manufacturer's instructions for application and drying time.
Clamps: Clamps are essential for holding the frame pieces together while the adhesive dries. Corner clamps are particularly useful for ensuring the corners remain square during the bonding process. Various sizes and types of clamps are available, select those appropriate for the frame’s dimensions and material.
Safety Glasses and Gloves: Safety precautions are paramount when working with tools and adhesives. Safety glasses protect the eyes from debris, while gloves protect the hands from cuts, splinters, and chemical exposure.
Sandpaper: Sandpaper is used to smooth rough edges and surfaces on the frame material. Different grits of sandpaper may be required, starting with a coarser grit for initial smoothing and progressing to a finer grit for a polished finish.
Paint, Stain, or Finish (Optional): Depending on the desired aesthetic, paint, stain, or other finishes can be applied to the frame material. Choose a finish that complements the mirror and the surrounding décor. Ensure the finish is compatible with the chosen frame material and apply it according to the manufacturer's instructions.
Mirror Adhesive or Clips: Mirror adhesive is specifically designed to bond mirrors to surfaces without damaging the reflective backing. Mirror clips provide a mechanical means of securing the mirror within the frame. Choose the appropriate method based on the size and weight of the mirror and the type of frame constructed.
Level: A level is essential for ensuring the framed mirror is hung straight on the wall.
Drill and Screws: A drill and appropriate screws are required for attaching the frame to the wall. The type of screws will depend on the wall type (drywall, plaster, or masonry). Use wall anchors if necessary to provide adequate support.
Step-by-Step Framing Process
The following steps detail the process of framing a frameless mirror, outlining the key actions required at each stage.
Step 1: Measure the Mirror: Accurately measure the dimensions of the mirror, including the thickness. These measurements will determine the size of the frame needed. It is crucial to measure precisely to avoid gaps or overlaps between the mirror and the frame.
Step 2: Cut the Frame Pieces: Using a miter saw or miter box and hand saw, cut the frame pieces to the required lengths. Remember to cut the corners at a 45-degree angle to create a mitered joint. Double-check the measurements before cutting to minimize errors. Cutting slightly longer is preferable as the pieces can always be trimmed further.
Step 3: Assemble the Frame: Apply wood glue or construction adhesive to the mitered edges of the frame pieces. Carefully align the corners and clamp the frame together using corner clamps or regular clamps. Ensure the frame is square and that the corners are tightly joined. Allow the adhesive to dry completely according to the manufacturer's instructions. This step is critical for ensuring the frame's structural integrity and visual appeal.
Step 4: Sand and Finish the Frame: Once the adhesive is dry, remove the clamps and sand the frame to smooth any rough edges or imperfections. If desired, apply paint, stain, or other finishes to the frame. Allow the finish to dry completely before proceeding. Pay attention to the details during this step to achieve a professional-looking finish.
Step 5: Attach the Mirror to the Frame: There are a few methods to attach the mirror to the frame. One method uses mirror adhesive. Apply a thin, even layer of mirror adhesive to the back of the mirror, avoiding the edges. Carefully position the mirror within the frame and press firmly to ensure good contact. Allow the adhesive to cure completely according to the manufacturer’s directions. Another method utilizes mirror clips. Position the mirror within the frame and secure it with mirror clips. Ensure the clips are securely fastened to the frame and that they do not obstruct the mirror's surface.
Step 6: Mount the Framed Mirror: Locate the desired position for the framed mirror on the wall. Use a level to ensure the mirror will be hung straight. Mark the locations for the mounting screws or brackets. Drill pilot holes at the marked locations and insert wall anchors if necessary. Attach the mirror to the wall using screws or brackets. Ensure the mirror is securely mounted and that it is level. This is the final step and should be performed with care to avoid damaging the wall or the framed mirror.
Framing a frameless mirror is a rewarding project that can significantly enhance the aesthetic of a room. By carefully considering the frame style, material, and dimensions, and by following the step-by-step process outlined above, a professionally framed mirror can be achieved. Remember to prioritize safety and accuracy throughout the process for optimal results.

How To Frame Out That Builder Basic Bathroom Mirror For 20 Or Less

How To Frame Out That Builder Basic Bathroom Mirror For 20 Or Less

How To Frame Out That Builder Basic Bathroom Mirror For 20 Or Less

Diy Bathroom Mirror Frame For Under 10 O Hayley Blog

How To Frame Out That Builder Basic Bathroom Mirror For 20 Or Less

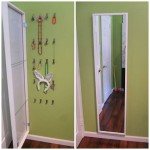
How To Install A Mirror Without Frame Merrypad

How To Frame Out That Builder Basic Bathroom Mirror For 20 Or Less

Framed Vs Frameless Bathroom Mirror Style Guide Abc Glass
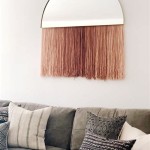
:strip_icc()/DesireeBurnsInteriors1-f76d25cad90041c88fbae4a7dc10aab4.jpg?strip=all "2 Simple Ways To Hang A Frameless Mirror")
2 Simple Ways To Hang A Frameless Mirror

How To Frame A Mirror With Clips In 5 Easy Steps