How To Frame A Hanging Mirror
Framing a hanging mirror elevates its aesthetic appeal, transforming a functional object into a statement piece. Whether the mirror is destined for a bathroom, bedroom, or hallway, adding a frame provides an opportunity to enhance the overall décor and complement existing design elements. This article provides a comprehensive guide to framing a hanging mirror, covering various methods and considerations for achieving a professional and visually appealing result.
Understanding Mirror Framing Options
Before commencing the framing process, it is crucial to understand the different options available. The selection of a suitable framing method depends on factors such as budget, desired aesthetic, skill level, and the existing structure of the mirror. Major framing options involve constructing a frame around the mirror or affixing molding directly to the mirror's surface.
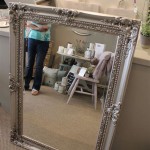
Built-Around Frames: This method involves creating a frame from scratch, typically using wood, and then mounting the mirror within the frame. This approach offers the most design flexibility, allowing for customization of frame size, material, and style. The frame is constructed separately and then attached to the mirror using appropriate adhesives or securing hardware.
Directly Applied Molding: This option involves attaching molding directly to the face of the mirror, creating a frame effect without building a separate structure. This approach is less complex and requires fewer tools, making it suitable for beginners. A variety of molding styles are available, including decorative trim, mirrored strips, and even paint.
Pre-Made Frames: Pre-made mirror frames are readily available at home improvement stores and online retailers. These frames are designed to accommodate specific mirror sizes and shapes, providing a convenient and time-saving option. While pre-made frames offer less customization, they often are crafted to a high standard and provide a polished, professional result.
When choosing a framing option, it is essential to consider the weight of the mirror and the intended hanging method. Heavier mirrors require more robust framing options and secure mounting hardware. Assessing these factors beforehand is crucial for a safe and aesthetically pleasing outcome.
Preparing the Mirror and Workspace
Proper preparation is essential for a successful framing project. This involves cleaning the mirror, selecting and gathering the necessary tools and materials, and preparing the workspace. These steps ensure a smooth and efficient framing process.
Cleaning the Mirror: Begin by thoroughly cleaning the mirror surface to remove any dirt, dust, or fingerprints. Use a glass cleaner and a lint-free cloth to achieve a streak-free finish. This ensures optimal adhesion if applying molding directly to the mirror surface.
Gathering Tools and Materials: The required tools and materials will vary depending on the chosen framing method. For building a frame from scratch, these may include: wood (of choice and dimension), a saw (miter saw is useful for angled cuts), measuring tape, wood glue, clamps, sandpaper, wood stain or paint, sealant (polyurethane or varnish), drill, screws, and safety glasses.
For attaching molding directly to the mirror, the required materials include: molding strips (wood, plastic, or metal), measuring tape, miter box, a saw, adhesive (mirror adhesive is essential), painter’s tape, and a level. Pre-made frames will typically come with their own mounting hardware.
Preparing the Workspace: Designate a clean and well-lit workspace. Cover the working surface with a drop cloth or protective sheet to prevent damage from spills or scratches. Ensure adequate ventilation, especially when working with paints, stains, or adhesives. Arrange all tools and materials within easy reach to streamline the framing process.
Measuring and Cutting: Accurate measurements are paramount for a properly fitted frame. Measure the mirror's dimensions (length and width) precisely. If building a frame, calculate the required dimensions of the frame pieces, taking into account the desired frame width and any overlapping edges. If attaching molding directly, calculate the required length of each molding strip, accounting for mitered corners (typically 45-degree angles). When cutting materials, use a miter saw or miter box to ensure precise and clean cuts.
Framing Techniques: Building a Frame
Constructing a frame from scratch offers the greatest degree of customization and control over the final look. This method involves cutting, assembling, and finishing the frame before attaching it to the mirror.
Cutting the Frame Pieces: Using the measurements obtained, cut the frame pieces from the chosen wood or material. For a traditional rectangular frame, cut four pieces: two for the top and bottom, and two for the sides. Miter the ends of each piece at a 45-degree angle to create seamless corners. Ensure that all cuts are accurate and clean for a professional finish.
Assembling the Frame: Apply wood glue to the mitered ends of the frame pieces. Join the pieces together to form a rectangle, ensuring that the corners are aligned. Use clamps to hold the frame together securely while the glue dries. This step is crucial for creating strong and durable joints.
Reinforcing the Corners: For added strength and stability, reinforce the corners of the frame with screws. Drill pilot holes through the corners and into the adjoining pieces of wood. Then, insert screws into the pilot holes, countersinking them slightly below the surface of the wood. This will prevent the screw heads from interfering with the finishing process.
Sanding and Finishing: Once the glue has dried and the corners are reinforced, sand the frame to create a smooth and even surface. Start with a coarse sandpaper to remove any imperfections or rough edges, then gradually switch to finer grades of sandpaper. After sanding, apply a wood stain or paint to achieve the desired color and finish. Allow the stain or paint to dry completely before applying a sealant, such as polyurethane or varnish. The sealant will protect the frame from moisture and wear, extending its lifespan.
Attaching the Mirror to the Frame: After the frame is assembled and finished, it is time to attach the mirror. Apply a bead of mirror adhesive to the back of the mirror, near the edges. Carefully position the mirror within the frame, ensuring that it is centered and aligned. Press the mirror firmly against the frame and allow the adhesive to dry completely. For additional security, consider using mirror clips or brackets to hold the mirror in place.
Framing Techniques: Applying Molding Directly
Applying molding directly to the mirror surface is a simpler and faster alternative to building a frame from scratch. This method involves cutting and affixing molding strips around the perimeter of the mirror.
Cutting the Molding Strips: Measure the mirror's dimensions and calculate the required length of the molding strips. Miter the ends of each strip at a 45-degree angle to create seamless corners. Use a miter box and saw for accurate cuts. Accuracy in cutting is crucial for the aesthetics of the directly applied frame.
Applying Adhesive: Apply a thin bead of mirror adhesive to the back of each molding strip. Ensure that the adhesive is specifically designed for use on mirrors to avoid damaging the reflective surface. Avoid applying excessive adhesive, as this can cause it to squeeze out from under the molding strips.
Attaching the Molding Strips: Carefully position the molding strips along the edges of the mirror, aligning the mitered corners. Press the strips firmly against the mirror surface and hold them in place with painter's tape. The painter's tape will secure the molding strips while the adhesive dries. Ensure the molding is aligned so that no mirror surface is hidden, or symmetrically, at the framer's preference.
Allowing Adhesive to Dry: Allow the adhesive to dry completely according to the manufacturer's instructions. This may take several hours or even overnight. Avoid disturbing the molding strips during this time to ensure a strong and secure bond. Remove the painter's tape once the adhesive is fully dried.
Sealing the Edges: To prevent moisture from seeping behind the molding strips, seal the edges with a bead of clear silicone caulk. Apply the caulk evenly along the edges, smoothing it out with a finger or a caulk smoothing tool. This will create a watertight seal and protect the mirror from damage.
Hanging the Framed Mirror
The final step involves securely hanging the framed mirror on the wall. The chosen hanging method will depend on the weight of the mirror and the type of wall. Safe hanging provides both aesthetic value and prevents damage or injury from the mirror falling.
Choosing Hanging Hardware: Select appropriate hanging hardware based on the weight of the mirror. For lighter mirrors, picture hooks or D-rings may be sufficient. For heavier mirrors, use heavy-duty picture hangers or wall anchors. Ensure that the chosen hardware is rated to support the mirror's weight.
Locating Wall Studs: Use a stud finder to locate wall studs. Hanging the mirror from a stud provides the most secure support. If studs are not available at the desired location, use wall anchors to provide additional support.
Marking the Hanging Location: Measure and mark the desired hanging location on the wall. Use a level to ensure that the mark is straight and even. Pre-drill pilot holes at the marked location before installing the hanging hardware, if necessary.
Installing Hanging Hardware: Install the chosen hanging hardware at the marked location. For picture hooks, simply hammer the hook into the wall. For wall anchors, follow the manufacturer's instructions for installation. Ensure that the hardware is securely mounted and able to support the mirror's weight.
Hanging the Mirror: Carefully lift the framed mirror and hang it on the installed hardware. Ensure that the mirror is securely attached and level. Double-check the stability of the mirror before releasing it. Make any necessary adjustments to ensure that the mirror is hanging straight and securely.

How To Build A Diy Frame Hang Over Bathroom Mirror Love Our Real Life

How To Make An Easy Diy Round Mirror Frame Step By Instructions Homify Marcos Para Espejos Espejo

How To Adjust A Mirror Art Or Picture Hanging Wire

Picture Wire Strung Between Two D Rings Attached To The Back Of A Frame Hanging Mirror Heavy

Motini Round Hanging Mirror Circle 26 Inch Gold Brushed Brass Stainless Steel Metal Frame With Chain And Hook Wall Mounted Vanity For Ba

Vintage Rustic Wood Frame Wall Hanging Mirror Chairish

Xramfy 24 In W X H Round Mirror With Hanging Leather Strap Aluminum Frame Black Wall Rmls24 The Home Depot

32 In H X W Black Round Frame Hanging Bathroom Mirror With Led Light Sw Ysj Bl 6 The Home Depot

Wall Hanging Mirror With Chain Bedroom Frame Home Bathroom Decor Com

Metal Frame Leather Hanging Mirrors For Round Wall Home Hotel Led Mirror Light Bathroom Decor With Strap China Vanity Made In Com