How To Hang A Tilted Mirror
Mirrors serve both a functional and aesthetic purpose within a home. They reflect light, making rooms appear larger, and they contribute to the overall décor. While traditional mirror hanging methods focus on a perfectly vertical alignment, intentionally tilting a mirror can add a unique design element, introducing visual interest and a more relaxed atmosphere. However, hanging a tilted mirror requires careful planning and execution to ensure it remains secure and achieves the desired aesthetic effect. This article will outline the steps involved in successfully hanging a tilted mirror.
Before commencing the installation process, several factors must be considered. These include the size and weight of the mirror, the type of wall it will be hung on, and the desired angle of tilt. A larger, heavier mirror will require more robust hardware and a more structurally sound wall. The wall type (drywall, plaster, or concrete) significantly impacts the type of anchors needed. Finally, the angle of tilt will influence the placement of the mounting hardware. Proper consideration of these factors is crucial for a safe and visually appealing installation.
Key Point 1: Preparation and Material Gathering
The first step involves gathering the necessary tools and materials. This includes a level, measuring tape, pencil, stud finder, drill, appropriate drill bits (matching the wall type and anchor size), wall anchors or screws (again, determined by wall type and mirror weight), picture hanging wire or D-rings (if not already attached to the mirror), and safety glasses. A screwdriver (Phillips head or flathead, depending on the screws) is also required. It is highly recommended to have a helper, especially when dealing with larger, heavier mirrors.
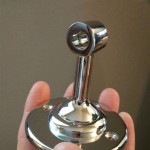
Next, evaluate the mirror's existing hardware. Many mirrors come with pre-installed D-rings or a wire across the back for hanging. If these are present, ensure they are securely attached and capable of supporting the mirror's weight. If the mirror lacks hanging hardware, it will be necessary to install it. D-rings are generally preferred for heavier mirrors as they provide a more secure attachment point. Attach D-rings to the back of the mirror frame, ensuring they are equidistant from the top edge and securely fastened with screws.
With the mirror and hardware assessed, the next step is to locate wall studs. Using a stud finder, identify the studs in the desired hanging location. Hanging the mirror directly onto a stud provides the strongest support. If a stud is not available in the ideal location, appropriate wall anchors must be used. Several types of wall anchors are available, including drywall anchors, toggle bolts, and concrete anchors. The choice depends on the wall material and the weight of the mirror. Follow the manufacturer's instructions for installing the chosen wall anchors.
Once the studs are located or anchors are installed, measure and mark the desired hanging location on the wall. Use a level to ensure the marks are horizontally aligned. Determining the precise location is critical for achieving the desired tilt angle. It may be helpful to temporarily hold the mirror against the wall at the desired angle to visualize the final placement and make any necessary adjustments. Mark the upper and lower points where the mirror's hanging hardware will make contact with the wall.
Key Point 2: Installation for the Tilted Effect
The essence of hanging a tilted mirror lies in the strategic placement of the mounting hardware. Unlike a vertically hung mirror where the mounting points are typically level, a tilted mirror requires the mounting points to be offset to create the desired angle. The amount of offset depends on the size of the mirror and the intended degree of tilt. A larger mirror or a steeper tilt will require a greater vertical offset between the mounting points.
After determining the upper and lower contact points on the wall, drill pilot holes at these locations. If using wall anchors, insert them into the pilot holes, ensuring they are flush with the wall surface. Then, insert screws into the anchors, leaving enough of the screw head exposed to accommodate the mirror's hanging wire or D-rings. If hanging directly into a stud, use appropriately sized screws and ensure they are driven deep enough to provide secure hold. The screws should be sturdy enough to support at least twice the mirrors weight.
With the mounting hardware properly installed, carefully lift the mirror (preferably with assistance) and hang it onto the screws. Ensure the hanging wire or D-rings are securely attached to the screws. Step back and assess the tilt angle. If the angle is not as desired, make minor adjustments to the screw positions. Tightening the lower screw or loosening the upper screw will increase the tilt, while loosening the lower screw or tightening the upper screw will decrease the tilt. Make these adjustments incrementally and re-evaluate the angle after each adjustment.
When satisfied with the tilt angle, use a level to verify that the mirror is not only tilted as desired but also that it is not leaning to one side or the other. If necessary, make further minor adjustments to the screw positions to ensure the mirror is balanced and stable. Once the mirror is securely hung and properly aligned, double-check that all screws are tightened adequately to prevent any slippage or movement. This will ensure the mirror remains in place and maintains the intended tilt.
Key Point 3: Safety Considerations and Refinement
Safety is paramount throughout the entire hanging process. Always wear safety glasses to protect the eyes from dust and debris when drilling. Use caution when handling tools, particularly drills and screwdrivers, to avoid injury. If working at heights, use a stable ladder or step stool and ensure it is placed on a level surface. It is also essential to have a helper when lifting and hanging larger, heavier mirrors to prevent accidents and damage to the mirror or the wall. Before starting the process, verify that there are no electrical wires or pipes behind the hanging location. If there is any doubt, consult with a qualified electrician or plumber.
After the mirror is securely hung, perform a final inspection to ensure it is stable and not at risk of falling. Gently push on the mirror from different angles to assess its stability. If there is any movement or wobbling, re-tighten the screws or consider using stronger anchors. For added security, particularly in high-traffic areas or homes with children or pets, consider using safety wires or straps to further secure the mirror to the wall. These can provide an extra layer of protection in case of accidental bumps or impacts.
Finally, assess the aesthetic impact of the tilted mirror within the overall décor of the room. Consider how the tilt affects the reflection of light and the perceived size of the space. If the tilt seems too extreme or not impactful enough, make further minor adjustments to the screw positions until the desired effect is achieved. The goal is to create a visually appealing and harmonious addition to the room. A well-placed, tilted mirror can transform a space, creating a more dynamic and engaging atmosphere.
Maintaining the cleanliness of the mirror is equally important. Regularly clean the mirror surface with a glass cleaner and a soft cloth to remove dust and smudges. Avoid using abrasive cleaners or cloths, as these can scratch the mirror's surface. Inspect the hanging hardware periodically to ensure it remains secure and free from corrosion. If any signs of wear or damage are detected, replace the hardware immediately to prevent the mirror from falling. By following these maintenance guidelines, the tilted mirror will continue to enhance the beauty of the room for years to come.

Tilted Mirror

Why Frames Tilt Forward The 100 Billionth Person

How To Put A Mirror On An Angled Wall Over Bathroom Sink Vanity

How To Hang A Heavy Full Length Leaner Mirror On The Wall House Of Hepworths

Things To Know Before Hanging A Mirror Above The Fireplace

Why Frames Tilt Forward The 100 Billionth Person

How To Hang A Heavy Full Length Leaner Mirror On The Wall House Of Hepworths

Why Frames Tilt Forward The 100 Billionth Person

How To Secure A Heavy Leaning Floor Mirror The Wall Love Our Real Life

How To Hang A Heavy Full Length Leaner Mirror On The Wall House Of Hepworths