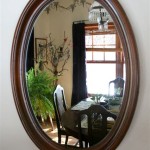
How To Install a Mirror Over a Vanity
Installing a mirror over a vanity is a common home improvement project that can significantly enhance a bathroom's aesthetic appeal and functionality. This article provides a comprehensive guide to successfully installing a bathroom mirror, covering essential tools, preparation steps, and installation techniques.
Gathering Necessary Tools and Materials
Before beginning the installation, gather all the necessary tools and materials. This preparation ensures a smooth and efficient process. The required items typically include:
- Measuring tape
- Pencil
- Level
- Drill with appropriate drill bits
- Screwdrivers
- Wall anchors (if needed)
- Mirror adhesive
- Mirror clips (optional)
- Safety glasses
- Stud finder
Preparing the Wall and the Mirror
Proper preparation is crucial for a secure and aesthetically pleasing mirror installation. This involves ensuring the wall surface is clean, smooth, and free of any obstructions. The mirror should also be inspected for any damage.
- Clean the wall surface with a mild detergent and water solution, removing any dust, grease, or debris.
- Inspect the wall for any imperfections or protrusions. Patch any holes or irregularities with spackle and allow it to dry completely. Sand the patched areas smooth for a seamless finish.
- Carefully inspect the mirror for any chips or cracks. Ensure the mirror's edges are smooth and free of any defects.
Locating and Marking Stud Positions
Locating the wall studs is essential for providing secure anchoring points for the mirror, especially for heavier mirrors. A stud finder is a valuable tool for this process. Mark the stud locations with a pencil for easy reference during installation.
- Use a stud finder to locate the wall studs behind the vanity area.
- Mark the stud locations on the wall with a pencil.
- Consider the mirror's dimensions and weight when determining the optimal stud placement for mounting.
Measuring and Marking Mirror Placement
Accurate measurements are critical for ensuring the mirror is centered and positioned correctly. Take precise measurements and carefully mark the desired mirror location on the wall.
- Measure the width of the vanity and the width of the mirror.
- Calculate the center point of the vanity and the center point of the mirror.
- Mark the center point of the mirror placement on the wall, aligning it with the vanity's center point.
- Use a level to ensure the marked line is perfectly horizontal.
Applying Mirror Adhesive
Mirror adhesive provides a strong bond and helps secure the mirror to the wall. Apply the adhesive according to the manufacturer's instructions, ensuring even coverage for optimal adhesion.
- Apply mirror adhesive to the back of the mirror, following the manufacturer's recommended pattern.
- Avoid applying adhesive too close to the mirror's edges to prevent it from squeezing out during installation.
- Ensure adequate adhesive coverage for secure bonding.
Mounting the Mirror on the Wall
Carefully position the mirror on the wall, aligning it with the marked lines. Apply gentle pressure to ensure proper adhesion. Use shims if necessary to maintain level placement during the adhesive's curing time.
- Carefully lift the mirror and position it against the wall, aligning it with the marked lines.
- Apply even pressure to the mirror surface to ensure proper adhesion.
- Use shims, if needed, to maintain the mirror's level position while the adhesive cures.
Securing the Mirror with Clips or Screws (Optional)
While adhesive often provides sufficient support, using mirror clips or screws offers additional security, especially for larger or heavier mirrors. This step enhances stability and prevents accidental shifting or detachment.
- If desired, install mirror clips or screws to further secure the mirror to the wall. Position these fasteners into the wall studs for optimal support.
- Ensure the clips or screws are properly tightened without applying excessive pressure that could damage the mirror.
- Consider using decorative caps to conceal the screw heads for a more polished appearance.
Cleaning and Final Inspection
Once the mirror is securely mounted, clean any excess adhesive and fingerprints from the mirror surface. Conduct a final inspection to ensure the mirror is level, securely attached, and free of any damage.
- Clean the mirror surface with glass cleaner and a soft cloth, removing any fingerprints, smudges, or adhesive residue.
- Inspect the mirror installation to ensure it is level, securely mounted, and aesthetically pleasing.
- Check for any gaps or irregularities around the mirror's edges. Seal any gaps with a suitable sealant to prevent moisture intrusion.

How To Pick And Hang The Perfect Bathroom Mirror Roomhints

Tutorial How To Hang A Bathroom Mirror The Diy Playbook

Guide To Hanging Bathroom Vanity Lighting And Mirrors Liven Design

How To Hang A Bathroom Mirror Over Tile Wainscoting Mimzy Company

How High Should You Hang The Mirror In A Bathroom With Photos Design Morsels

Hanging A Mirror Over Another Decor To Adore

Tutorial How To Hang A Bathroom Mirror The Diy Playbook

How To Pick And Hang The Perfect Bathroom Mirror Roomhints

How To Pick And Hang The Perfect Bathroom Mirror Roomhints

How To Install A Bathroom Mirror The Home Depot