How To Make a Mirror Frame at Home Easily
Creating a custom mirror frame at home can be a rewarding and enjoyable project. It allows you to personalize your decor and add a touch of elegance to any room. This guide provides a step-by-step process for crafting a mirror frame using readily available materials and tools. From choosing the right frame to adding finishing touches, this comprehensive guide will equip you with the knowledge and confidence to create a stunning statement piece for your home.
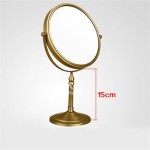
1. Choosing the Right Frame
The first step in making a mirror frame is selecting the appropriate frame for your mirror. Consider the size and shape of your mirror as well as the style of your room. Here are some factors to keep in mind when choosing your frame:
-
Size and Shape:
Ensure the frame is wide enough to accommodate the mirror and create a visually balanced design. Rectangular frames are common for traditional mirrors, while round or oval frames suit contemporary styles. -
Material:
Choose a material that complements the style of your mirror and your room decor. Popular choices include wood, metal, and plastic. -
Width:
The width of the frame can influence the overall look and feel of your mirror. A narrow frame creates a subtle accent, while a wide frame makes a bolder statement. -
Style:
Consider the style of your mirror and room decor when selecting your frame. Traditional mirrors often look best with ornate frames, while modern mirrors may suit minimalist or geometric designs.
Once you have chosen your frame, consider whether you want to use it in its original form or personalize it further. For example, you could paint the frame, distress it, or add embellishments such as beads or buttons.
2. Preparing the Frame
Before you begin assembling your mirror frame, it's crucial to prepare the frame adequately. This involves cleaning and preparing the surface to ensure a smooth and even finish. Here's a simple guide to prepping your frame:
-
Clean the Frame:
Remove any dust, dirt, or debris from the frame using a damp cloth. Allow the frame to dry completely before proceeding. -
Sand the Frame:
If the frame is made of wood, sanding it will create a smooth surface for painting or staining. Start with coarse-grit sandpaper and gradually move to finer-grit sandpaper for a polished finish. -
Prime the Frame:
If you plan on painting your frame, priming it beforehand will help the paint adhere better and create a smoother finish. Choose a primer suitable for the material of your frame.
3. Assembling the Frame
Once the frame is prepared, you can start assembling it around your mirror. This process may vary depending on the type of frame you have chosen. Common methods include:
-
Miter Joints:
For wood frames, you may need to cut the frame pieces at 45-degree angles to create miter joints. This requires precision and can be accomplished using a miter saw or a handsaw. -
Butt Joints:
For simpler frames, you can use butt joints, where the ends of the frame pieces meet at right angles. This method may require additional support, such as glue or nails, to ensure a secure bond. -
Using Pre-Made Frames:
For a quicker and easier option, consider using pre-made frame kits, which typically include all the necessary components for assembly.
Regardless of the method you choose, ensure that the frame pieces are securely fastened together. Use wood glue, nails, or screws depending on the material and construction of your frame.
4. Finishing Touches
After the frame is assembled, you can add your personal finishing touches. This could include:
-
Painting the Frame:
Choose a paint color that complements your room décor or the style of your mirror. Consider using a brush, roller, or spray paint, depending on the size and complexity of your frame. -
Distressing the Frame:
For a vintage or rustic look, you can distress the frame by sanding down the edges or creating a chipped effect. Use sandpaper or a metal brush to achieve the desired level of distressing. -
Adding Embellishments:
Get creative and add embellishments such as beads, buttons, or decorative trim to personalize your frame.
Finally, attach the mirror to the frame. Some mirrors have pre-installed clips, while others may require additional support, such as adhesive or screws.
Creating a custom mirror frame at home can be an enjoyable and rewarding experience. However, remember to prioritize safety and use caution when working with tools and materials. With a little effort and creativity, you can create a stunning statement piece that will enhance your home decor.

Easy Diy Stick Framed Mirror That Looks Expensive

How To Make Any Frame Into A Mirror Stonegable

Diy Mirror Frame Home Decor Ideas
:max_bytes(150000):strip_icc()/kaylasimonehome-905941da7dd04a08af07c415df2a1fd8.jpeg?strip=all "20 Diy Mirror Frame Ideas To Inspire Your Next Project")
20 Diy Mirror Frame Ideas To Inspire Your Next Project

30 Diy Mirror Frames Frame Easy

Easy Driftwood Mirror The Wood Grain Cottage

17 Easy Impressive Mirror Makeovers Frugal Mom Eh Makeover Bathroom Mirrors Diy

How To Paint A Mirror Frame An Easy Diy Home Decor Project

How To Build A Mirror Frame Sunshine And Rainy Days

Diy Farmhouse Wood Frame Mirror She Gave It A Go