How To Make A Mirror Frame At Home Easily
Creating a custom frame for a mirror is a rewarding project that enhances the mirror's aesthetic appeal and complements the surrounding decor. This article provides a step-by-step guide on how to craft a simple yet elegant mirror frame using readily available materials and tools.
1. Gather Materials and Tools
Before commencing the project, assembling all necessary materials and tools streamlines the process and prevents interruptions. Essential materials include the mirror itself, wood for the frame (1x2 or 1x4 inch boards are recommended), wood glue, wood filler, measuring tape, a saw (miter saw or handsaw), sandpaper, and finishing supplies (paint, stain, or sealant).
2. Measure and Cut the Wood
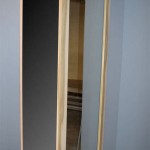
Accurate measurement is crucial for a well-fitting frame. Measure the length and width of the mirror precisely. Add twice the desired frame width to these measurements to determine the length of the frame pieces. For example, for a mirror measuring 12x18 inches and a desired frame width of 2 inches, the frame pieces would need to be 16 and 22 inches long, respectively. Cut four pieces of wood according to these measurements – two for the length and two for the width. A 45-degree miter cut at each end of the frame pieces ensures seamless corners.
3. Assemble the Frame
Applying wood glue to the mitered edges is the first step in assembling the frame. Carefully align the pieces to form a rectangular frame, ensuring tight joints. Use clamps to hold the pieces together while the glue dries. Drying time varies depending on the type of glue used; following the manufacturer's instructions is recommended.
4. Secure and Reinforce the Frame
While glue provides initial adhesion, reinforcing the frame with brad nails enhances its stability and longevity. Small brad nails, driven into the corners at an angle, provide extra security. Countersink the nails slightly and fill the holes with wood filler for a smooth finish.
5. Sand and Prepare for Finishing
Once the glue and wood filler have completely dried, sand the frame to smooth out any imperfections and create a uniform surface. Start with a coarser grit sandpaper (e.g., 120 grit) and gradually progress to a finer grit (e.g., 220 grit) for a smooth, professional finish. Thorough sanding ensures even application of the chosen finish.
6. Apply the Finish
The choice of finish depends on personal preference and the desired aesthetic. Painting the frame offers a wide range of color options, while staining allows the natural wood grain to show through. Apply the paint or stain evenly in thin coats, allowing each coat to dry completely before applying the next. A sealant provides added protection and durability, particularly in humid environments.
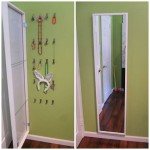
7. Attach the Mirror to the Frame
Several methods exist for attaching the mirror to the frame. Mirror clips, available at most hardware stores, offer a secure and discreet option. Alternatively, strong adhesive can be used, ensuring even distribution to prevent stress points on the mirror. Follow the manufacturer's instructions for both mirror clips and adhesive to ensure proper application and secure attachment.
Creating a homemade mirror frame offers a customizable and cost-effective solution to enhance any mirror. Following these straightforward steps allows for a successful project that results in a beautiful and personalized piece of home decor.

30 Diy Mirror Frames Scratch And Stitch

Diy Mirror Frame Home Decor Ideas

20 Fantastic Diy Mirror Frame Ideas A Cultivated Nest

20 Fantastic Diy Mirror Frame Ideas A Cultivated Nest Decor

Easy Diy Stick Framed Mirror That Looks Expensive

Easy Driftwood Mirror The Wood Grain Cottage
:max_bytes(150000):strip_icc()/hercandidcanvas-ac3762e949ef4f00ac9191b71163d687.jpg?strip=all "20 Diy Mirror Frame Ideas To Inspire Your Next Project")
20 Diy Mirror Frame Ideas To Inspire Your Next Project

20 Easy Creative Diy Mirror Frame Ideas

17 Easy Impressive Mirror Makeovers Frugal Mom Eh Makeover Bathroom Mirrors Diy

30 Diy Mirror Frames Scratch And Stitch