How to Make a Mirror Headboard
A mirror headboard can be a striking addition to a bedroom, enhancing the sense of space and light. Creating one is a manageable DIY project that allows for customization to match personal style and bedroom décor. This article outlines the process of constructing a mirror headboard, covering essential steps from planning and material selection to assembly and installation.
Planning and Design Considerations
The initial stage involves careful planning and design. This includes determining the dimensions of the headboard, choosing the style, and selecting the appropriate materials. Accuracy at this stage will significantly impact the final product's aesthetics and functionality.
Dimension Determination: The width of the headboard should ideally match or slightly exceed the width of the bed frame. The height is a matter of personal preference and room aesthetics. Consider the ceiling height and overall room proportions when deciding on the height. Measure the bed frame precisely to ensure a seamless fit. For example, a king-size bed typically requires a headboard around 76 inches wide, while a queen-size bed needs approximately 60 inches.
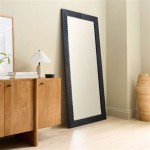
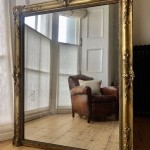
Style Selection: Mirror headboards can range from simple, minimalist designs to more elaborate, ornate styles. A simple, rectangular mirror can create a modern, clean look. Alternatively, incorporating shaped mirrors, mosaic patterns, or frames with intricate carvings can achieve a more decorative effect. Consider the existing décor of the bedroom and choose a style that complements it.
Material Choice: The primary materials include the mirror(s), a backing board, framing materials (if desired), adhesive, and hardware for mounting. The backing board, typically made of plywood or MDF (Medium-Density Fiberboard), provides structural support. Framing materials can be wood, metal, or even decorative molding. High-quality mirror adhesive is crucial for securely attaching the mirror to the backing board. Mounting hardware will depend on the type of wall and the weight of the headboard.
Sketching the Design: Before acquiring any materials, creating a detailed sketch of the headboard is highly recommended. The sketch should illustrate the dimensions, mirror placement, framing details, and mounting points. This visual representation serves as a blueprint throughout the construction process.
Material Acquisition and Preparation
Once the design is finalized, the next step involves acquiring all the necessary materials and preparing them for assembly. This may include cutting the backing board to size, cutting mirrors, preparing frames, and ensuring all surfaces are clean and ready for adhesive.
Backing Board: Plywood or MDF sheets are readily available at most home improvement stores. Have the sheet cut to the desired dimensions at the store for convenience and accuracy. Alternatively, use a circular saw or jigsaw to cut the sheet to size. Sand the edges of the backing board to remove any splinters or rough spots.
Mirror Selection and Cutting: Mirrors can be purchased pre-cut to size or cut from larger sheets. If cutting the mirror is necessary, it is highly recommended to seek professional assistance from a glass shop. Cutting mirrors requires specialized tools and expertise to avoid breakage and ensure safety. If attempting to cut the mirror, use a glass cutter, safety glasses, and gloves. Score the mirror along the desired cut line and then carefully snap it along the score.
Frame Preparation (Optional): If incorporating a frame, select the desired framing material and cut it to size using a miter saw or hand saw. Ensure the corners are cut at a 45-degree angle for a clean, professional look. Join the frame pieces using wood glue and clamps. Let the glue dry completely before proceeding.
Surface Preparation: Clean the backing board and the back of the mirror(s) with a clean cloth and glass cleaner. This removes any dust, dirt, or grease that could interfere with the adhesive bond. Ensure both surfaces are completely dry before applying adhesive.
Assembly and Installation
The assembly phase involves attaching the mirror(s) to the backing board, adding the frame (if applicable), and preparing the headboard for mounting. This stage requires patience and precision to ensure a secure and aesthetically pleasing result.
Mirror Attachment: Apply a generous amount of mirror adhesive to the back of the mirror(s) in a consistent pattern. Avoid applying adhesive too close to the edges, as it may squeeze out during the bonding process. Carefully position the mirror(s) onto the backing board, aligning them according to the planned design. Apply gentle pressure to the mirror(s) to ensure a strong bond. Use painter's tape to secure the mirror(s) in place while the adhesive cures. Allow the adhesive to cure completely, following the manufacturer's instructions, which typically takes 24-48 hours.
Frame Attachment (Optional): If using a frame, apply wood glue to the back of the frame and carefully position it around the mirror(s), aligning it precisely. Clamp the frame to the backing board and mirror(s) to ensure a secure bond. Allow the glue to dry completely before removing the clamps.
Mounting Hardware Installation: The method of mounting will depend on the wall type and the weight of the headboard. For lightweight headboards, D-rings and picture wire may be sufficient. Attach the D-rings to the back of the backing board, ensuring they are securely fastened. For heavier headboards, consider using French cleats or heavy-duty mounting brackets. French cleats provide a very secure and level mounting solution. Attach one half of the cleat to the back of the headboard and the other half to the wall, ensuring they are aligned correctly.
Wall Mounting: Before mounting the headboard, locate the wall studs using a stud finder. This will provide a secure anchoring point for the mounting hardware. Mark the location of the studs on the wall. If using D-rings and picture wire, hang the headboard on the wall, ensuring it is level. If using French cleats or mounting brackets, follow the manufacturer's instructions for installation. For drywall installations, consider using drywall anchors to provide additional support. Ensure the headboard is securely mounted and level before finishing. Check all connections and supports to ensure robustness. Once mounted, inspect the headboard for any imperfections or misalignments and make any necessary adjustments.
Safety Precautions
Working with mirrors and power tools requires adherence to several safety precautions to avoid injury. Safety glasses should always be worn when cutting or handling glass. Gloves should be used to protect hands from sharp edges. When using power tools, follow the manufacturer's instructions and use appropriate safety gear. Ensure the work area is well-ventilated and free of obstructions. When lifting heavy objects, use proper lifting techniques to avoid back injuries. If unsure about any aspect of the construction process, seek professional assistance. Dispose of any broken glass or mirror fragments safely and responsibly.
These instructions offer a comprehensive guide to constructing a mirror headboard, providing a foundation for customization and creative expression. By adhering to these guidelines and prioritizing safety, a striking and functional mirror headboard can be crafted, enhancing the aesthetic appeal of any bedroom.

19 Cool Ideas To Use Mirrors As Headboard Shelterness

19 Cool Ideas To Use Mirrors As Headboard Shelterness

How Would You Diy This Headboard Makely

Diy Mirrored Headboard

19 Cool Ideas To Use Mirrors As Headboard Shelterness

How To Update A Mirrored Headboard Without Losing Attached Storage Hometalk

Headboard Mirror Made From An Old Door Diy Apartment Decor

19 Cool Ideas To Use Mirrors As Headboard Shelterness

Diy How To Make A Mirrored Headboard Bed From Scratch With Mirror Tiles

Romantic Vintage Modern Antiqued Mirror Headboards Being Tazim