How To Make A Wall Mirror Free Standing
A free-standing mirror offers versatility and functionality, serving as both a decorative and practical addition to any room. Transforming a wall mirror into a free-standing piece is a relatively simple DIY project that can be accomplished with a few readily available materials and tools. This article will guide you through the process, providing several options to choose from based on your desired aesthetic and skill level.
1. Using an Easel
One of the easiest and most elegant ways to make a wall mirror free-standing is by using an easel. Easels are readily available in various sizes, materials, and styles, from simple wooden designs to ornate metal ones. Choose an easel that complements the size and style of your mirror, ensuring it provides adequate support. Simply place the mirror on the easel, adjusting the angle as needed. This method requires no modifications to the mirror itself, making it ideal for renters or those who prefer a non-permanent solution.
2. Building a Simple Frame Stand
Constructing a simple frame stand is a cost-effective and customizable solution. This method involves building a frame from wood, metal, or even repurposed materials. The frame should be slightly larger than the mirror and deep enough to provide stability. The mirror can be attached to the frame using mirror adhesive, clips, or brackets. This method allows for greater customization in terms of size, shape, and finish, allowing you to perfectly match the stand to your existing decor.
For a basic rectangular frame, measure the dimensions of your mirror and add a few inches to each side to determine the frame size. Cut the chosen material accordingly and assemble the frame using appropriate fasteners. Ensure the frame is square and sturdy before attaching the mirror. Consider adding felt pads to the bottom of the frame to protect flooring.
3. Repurposing Furniture Legs or Brackets
Old furniture legs or decorative brackets can be creatively repurposed to create unique and stylish mirror stands. Source legs from discarded furniture or purchase them new from hardware stores. Attach the legs or brackets to the back of the mirror using strong adhesive or screws, ensuring they are evenly spaced and provide adequate support. This method offers a chance to incorporate vintage or unique design elements into your mirror stand.
When selecting legs or brackets, consider the weight and size of the mirror. Ensure the chosen hardware can adequately support the mirror without tipping. A test fit is recommended before final attachment.
4. Constructing a Leaner Mirror Frame
Creating a leaner mirror frame offers a sleek and modern look. This involves building a frame that allows the mirror to lean against a wall at a slight angle. The frame can be constructed from wood or metal and should be wider than the mirror to provide stability. The mirror can be attached to the frame using adhesive or clips, ensuring it is securely held in place.
The angle of the leaner frame can be adjusted by modifying the length of the back supports. A shallower angle requires longer supports. Consider adding a safety chain or wire to secure the mirror to the wall and prevent accidental tipping.
5. Utilizing a Dresser or Vanity
An existing piece of furniture, such as a dresser or vanity, can easily be adapted to accommodate a wall mirror, effectively creating a free-standing unit. Simply place the mirror against the back of the dresser or vanity, ensuring it is stable and secure. You can add additional support by using adhesive strips or small brackets to attach the mirror to the furniture. This method provides a convenient and space-saving solution, particularly for smaller rooms.
Consider the height and placement of the dresser or vanity in relation to the mirror size. Ensure the combination creates a functional and aesthetically pleasing arrangement. If necessary, add padding or cushioning between the mirror and the furniture to prevent scratching.
6. Creating a Base with Decorative Molding
For a more decorative approach, consider building a base using molding or trim. Create a rectangular base from wood or MDF and attach decorative molding around the edges. The mirror can be attached to the base using adhesive or brackets. This method allows for a wide range of customization, allowing you to create a unique and ornate mirror stand.
Choose molding that complements the style of the mirror and the room's decor. Consider adding a finish to the molding, such as paint or stain, to enhance its appearance and protect it from wear and tear.
7. Attaching a Stand to the back of the Mirror
Several commercially available stands or brackets are specifically designed for attaching to the back of wall mirrors to convert them into free-standing versions. These stands can be found at hardware stores or online retailers and typically involve screwing the stand directly onto the back of the mirror frame. Ensure the stand chosen is compatible with the size and weight of the mirror and follow the manufacturer’s instructions for proper installation.
Carefully consider the placement of the screws to ensure they do not damage the mirror glass. Pre-drilling pilot holes is recommended. Verify the weight capacity of the stand before attaching it to the mirror.

Diy Modern Mirror Re Frame What Not To Do Kayla Simone Home

From Master To Mastered Home Decor Eclectic Bedroom

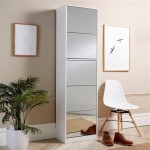
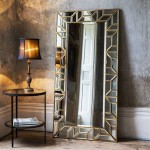
10 Ways To Decorate With Floor Mirrors That Are Right On Trend Bob Vila

12 Best Full Length Mirrors 2024 Affordable Long

Black Free Standing Cheval Mirror 155cm X 60cm Windsor Browne

Livingandhome Gold Arch Framed Full Length Mirror Wall Mounted Or Freestanding 40 X 150 Cm Diy At B Q

Ted Free Standing Mirror White Catchers

Livingandhome White Rectangular Freestanding Or Wall Mounted Framed Full Length Mirror Dressing 150 Cm X 40 Diy At B Q

Tinytimes 71 X30 Arched Full Length Mirror Large Freestanding Floor With Stand Modern Wall Mounted For Room Gold Com

H A Handa Large Full Length Floor Mirror 65x24 Big Mirrors For Wall Free Standing Dressing Bedroom Thickened Frame Mounted Mirr Frames On