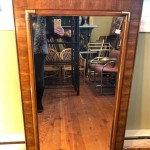
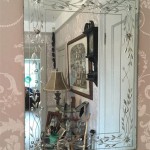
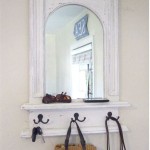
How to Make Mirror Mercury Glass
Mirror mercury glass offers a vintage, antiqued look that can elevate home decor, DIY projects, and event decorations. This technique creates a speckled, reflective surface that mimics the look of antique mercury glass, but with a more intense reflective quality thanks to the mirror base. While authentic mercury glass is challenging to create due to the hazardous nature of the materials involved, achieving the look with readily available supplies is quite feasible.
Preparing the Glass Surface
Preparation is crucial for achieving a professional and long-lasting finish. The glass surface must be thoroughly cleaned to ensure proper adhesion of the mirroring solution and the subsequent paint layers. Begin by washing the glass item with warm, soapy water and a soft sponge. Rinse the glass thoroughly to remove any soap residue. Once rinsed, dry the glass completely with a lint-free cloth. Any remaining dust, fingerprints, or residue can interfere with the mirroring process and lead to imperfections in the finished product.
For optimal results, clean the glass with a glass cleaner after washing and drying. This removes any lingering oils or smudges. Pay particular attention to the edges and corners of the glass, as these areas are prone to accumulating residue. Allow the glass cleaner to air dry completely before proceeding to the next step. For intricate glass items with hard-to-reach crevices, consider using a soft-bristled brush to ensure thorough cleaning.
Applying the Mirroring Solution
The mirroring effect is achieved by applying a specialized mirroring solution, commonly available in craft stores or online. These solutions typically consist of silver nitrate and other chemicals that react to create a reflective surface. Always work in a well-ventilated area when using these solutions, and follow the manufacturer's instructions carefully. Protective gloves and eyewear are recommended to prevent skin and eye irritation.
Before applying the mirroring solution, shake the container vigorously to ensure an even distribution of the chemicals. Different mirroring solutions have specific application methods, including spraying, brushing, or pouring. Follow the manufacturer's instructions for the chosen product. Some solutions require two coats for full opacity. Ensure each coat dries completely before applying the next. Avoid touching the mirrored surface until the entire process is complete, as fingerprints can mar the finish.
Creating the Mercury Glass Effect
Once the mirroring solution is dry and the mirror effect is established, the next stage involves creating the distinctive mercury glass look. This is achieved by applying a diluted paint mixture to the mirrored surface. The paint mixture typically consists of a combination of water, white vinegar, and acrylic craft paint. The ratio of these ingredients can be adjusted to control the opacity and texture of the final effect. A higher concentration of paint will result in a more opaque finish, while a more diluted mixture creates a more translucent, antique effect.
Apply the paint mixture using a spray bottle for an even distribution. Alternatively, a crumpled paper towel or sea sponge can be used to dab the paint onto the surface, creating a more textured, mottled appearance. Experiment with different application techniques to achieve the desired effect. Allow the paint mixture to dry slightly, then gently blot with a clean, dry cloth to reveal areas of the mirrored surface beneath. This creates the characteristic speckled look of mercury glass. The amount of blotting will determine the final look, with more blotting resulting in a more pronounced antiquing effect.
Sealing the Finish
After the painted layer has dried completely, seal the finish with a clear protective sealant. This helps to protect the mercury glass effect from scratches, chips, and general wear and tear. Various sealants can be used, including acrylic spray sealants or clear varnish. Apply the sealant in thin, even coats, allowing each coat to dry completely before applying the next. Multiple thin coats provide better protection than a single thick coat.
Choosing the appropriate sealant is crucial for ensuring the longevity of the finish. For items that will be handled frequently, a more durable sealant, such as a polyurethane varnish, is recommended. For decorative items that will not be subject to much handling, a standard acrylic sealant is sufficient. Always test the sealant on a small, inconspicuous area of the glass before applying it to the entire piece to ensure compatibility with the underlying paint and mirroring solution.

Flipping Houses Home Renovation In Silicon Valley

How To Create Mercury Glass Jennifer Rizzo

How To Diy Antiqued Mercury Mirror Glass 17 Apart

Diy How To Make Vintage Mirrors Or Mercury Glass By Orly Shani

Use This Faux Mercury Glass Technique To Make A Vintage Style Mirror My Crappy House

Beautiful Easy Faux Mercury Glass Diy Mirror Tutorial This Life

How To Make A Faux Mercury Glass Mirror Tidy Mo

Diy Mercury Glass Gilded Mirror Made From Old Photo Frames

How To Antique A Mirror Tutorial Jenna Sue Design

Beautiful Easy Faux Mercury Glass Diy Mirror Tutorial This Life