How to Put a Mirror On a Wardrobe Door
Adding a mirror to a wardrobe door can significantly enhance a room's functionality and aesthetic appeal. Mirrors can make a space feel larger and brighter, while also providing a convenient dressing aid. This article outlines the process of safely and effectively attaching a mirror to a wardrobe door, covering preparation, installation methods, and essential safety considerations.
Before commencing the installation, carefully assess the wardrobe door's material and structural integrity. The weight of the mirror will directly impact the choice of adhesive and mounting method. Solid wood doors can generally support heavier mirrors compared to lightweight composite or hollow-core doors. Furthermore, consider the door's thickness and whether it can accommodate screws or bolts without compromising its stability.
Accurately measure the wardrobe door and the mirror to be installed. These measurements are crucial for ensuring proper placement and alignment. It is advisable to leave a small border around the mirror's edges to prevent accidental impacts and potential damage. Document these measurements for reference throughout the installation process.
Preparing the Wardrobe Door for Mirror Installation
The first step involves preparing the wardrobe door's surface. This ensures a strong and lasting bond between the door and the mirror. Begin by thoroughly cleaning the door's surface to remove any dust, grease, wax, or existing finishes. Use a mild detergent and water solution, followed by a clean, dry cloth. For surfaces with stubborn residues, consider using a specialized degreaser designed for the door's material. Allow the surface to completely dry before proceeding.
If the wardrobe door has a glossy or smooth surface, lightly sanding it can create a better bonding surface for adhesives. Use fine-grit sandpaper (e.g., 220-grit) and gently sand the area where the mirror will be attached. After sanding, remove any sanding dust with a tack cloth or a damp cloth. Again, ensure the surface is completely dry before moving on.
For added adhesion, consider applying a primer specifically designed for bonding adhesives to the wardrobe door's material. This is particularly important for materials like melamine or laminate, which can be difficult to bond to. Apply the primer according to the manufacturer's instructions and allow it to dry completely before proceeding with mirror installation.
Choosing the Right Adhesive and Mounting Method
Selecting the appropriate adhesive and mounting method is critical for a secure and long-lasting mirror installation. Several options are available, each with its own advantages and disadvantages. The choice will depend on the mirror's size and weight, the wardrobe door's material, and the desired level of permanence.
Mirror mastic is a specialized adhesive formulated for bonding mirrors to various surfaces. It provides a strong and flexible bond that can withstand temperature and humidity fluctuations. Apply the mirror mastic in vertical beads or ribbons across the back of the mirror, ensuring even distribution. Avoid applying it too close to the mirror's edges to prevent squeeze-out. Also, ensure to use mirror mastic that is specifically labelled as safe for use with mirrors, as some adhesives can damage the mirror's backing over time.
Double-sided mirror tape is another option for lighter mirrors or as a supplementary measure in conjunction with mirror mastic. It provides instant adhesion and can help hold the mirror in place while the mastic cures. Apply the tape in strips across the back of the mirror, ensuring it is evenly distributed and covers a substantial area. It's crucial to use tape specifically designed for mirrors, as other types of tape may not provide sufficient adhesion or may damage the mirror's backing.
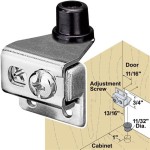
Mechanical fasteners, such as mirror clips or screws, offer the most secure mounting option, particularly for larger and heavier mirrors. Mirror clips are typically used in conjunction with adhesive to provide additional support. They are attached to the wardrobe door around the mirror's perimeter, holding it in place. When using screws, pre-drill pilot holes to prevent splitting the wardrobe door. Use screws with decorative caps to conceal the screw heads and enhance the aesthetic appeal. Ensure the screws are the correct length to avoid protruding through the other side of the door.
Installing the Mirror on the Wardrobe Door
With the wardrobe door prepared and the adhesive or mounting method selected, the next step is to install the mirror. Carefully position the mirror on the wardrobe door, aligning it with the previously marked measurements. Ensure the mirror is level and centered before applying pressure.
If using mirror mastic or adhesive alone, apply firm and even pressure to the mirror for several minutes to ensure good contact with the wardrobe door. Use shims or spacers to hold the mirror in place while the adhesive cures. Refer to the adhesive manufacturer's instructions for the recommended curing time, which can range from 24 to 72 hours. Avoid moving or disturbing the mirror during the curing process.
If using double-sided mirror tape, peel off the protective backing and carefully position the mirror on the wardrobe door. Apply firm and even pressure to ensure the tape adheres securely. The tape will provide instant adhesion, but it is still recommended to use mastic or mechanical fasteners for added support, especially for larger mirrors.
If using mirror clips or screws, position the mirror on the wardrobe door and secure it with the clips or screws. Ensure the clips are properly aligned and tightened to hold the mirror firmly in place. When using screws, pre-drill pilot holes to prevent splitting the wardrobe door. Use screws with decorative caps to conceal the screw heads and enhance the aesthetic appeal.
After the adhesive has cured or the mechanical fasteners are securely in place, carefully inspect the mirror installation. Ensure the mirror is securely attached to the wardrobe door and that there are no gaps or loose edges. Gently rock the mirror to test its stability. If any issues are detected, address them promptly to prevent the mirror from falling or becoming damaged.
Clean the mirror surface with a glass cleaner and a soft cloth to remove any fingerprints or smudges. Inspect the surrounding area for any adhesive residue or debris and clean it up accordingly. A clean installation will contribute to the overall aesthetic appeal and longevity of the mirrored wardrobe door.
If the mirror installation involves electrical components, such as integrated lighting, ensure all electrical connections are properly made and comply with local electrical codes. Consult a qualified electrician if necessary. Improper electrical work can pose a serious safety hazard.
Regularly inspect the mirror and its mounting hardware to ensure they remain secure and in good condition. Tighten any loose screws or replace any damaged clips or fasteners. Over time, vibrations or changes in temperature and humidity can loosen the hardware, potentially compromising the integrity of the installation.
When cleaning the mirror, avoid using abrasive cleaners or harsh chemicals that could damage the mirror's surface or backing. Use a mild glass cleaner and a soft cloth, and avoid spraying the cleaner directly onto the mirror's edges or backing, as this could cause damage over time.

How To Install A Mirror On Wardrobe Door

26 Inexpensive Diy Upgrades That Will Add A Touch Of Class To Your Home Decor Look

20 Diy Closet Mirror Door Makeover Angela Rose Home

How To Make Mirrored Wardrobe Doors Cut Plastic Sheeting

20 Mirror Closet And Wardrobe Doors Ideas Shelterness

How To Cover Closet Door Mirrors Easily

Diy Barn Door With Mirror Field Court

3 Ways To Hang A Door Mirror Wikihow

Framing Out A Mirror That S Mounted On Door Young House Love

Closet Door Mirror Installation Patriot Glass And San Diego Ca Diy Doors


