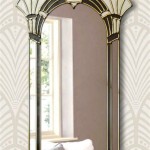
How To Affix a Mirror to a Dresser
Attaching a mirror to a dresser can transform a simple piece of furniture into a functional and stylish vanity. This addition not only enhances the dresser's utility for grooming and dressing but also adds visual appeal to the room. Several methods exist for securing a mirror to a dresser, each with its own advantages and disadvantages. The optimal method depends on factors such as the size and weight of the mirror, the material of the dresser, and the desired aesthetic.
Prior to commencing the project, meticulous planning and preparation are paramount. This includes selecting an appropriate mirror, gathering the necessary tools and materials, and carefully evaluating the dresser's structural integrity. A poorly executed mirror attachment can compromise the stability of the dresser, damage the mirror, or create an unsafe condition. Therefore, following a well-defined process is crucial for achieving a successful and lasting result.
Selecting the Appropriate Mirror
The selection of the mirror is a critical initial step. Several factors warrant consideration, including size, shape, style, and weight. The mirror's dimensions should be proportionate to the dresser's size. An excessively large mirror can overwhelm the dresser and appear unbalanced, while a mirror that is too small may lack sufficient functionality. Consider the overall shape of the dresser and select a mirror shape that complements it. Common shapes include rectangular, oval, and round, each offering a distinct aesthetic.
The style of the mirror should align with the existing décor of the room and the design of the dresser. Frames can range from ornate and traditional to sleek and modern, influencing the overall aesthetic. Moreover, the mirror's weight is a crucial factor, especially when choosing an attachment method. Heavier mirrors require more robust support to ensure stability and prevent the dresser from toppling over. Lighter mirrors offer more flexibility in attachment options.
Consider purchasing mirrors specifically designed to be attached to dressers. These mirrors often come with pre-drilled holes or mounting hardware, simplifying the installation process. They are also designed with safety in mind, utilizing tempered glass to minimize the risk of shattering into sharp pieces should breakage occur.
Methods for Attaching the Mirror
Several methods are commonly employed to affix a mirror to a dresser. The selection of the appropriate method hinges on the mirror's weight, the dresser's material, and the desired permanence of the attachment. Each method involves a unique set of steps and requires specific tools and materials.
1. Using Mounting Brackets: This method involves attaching metal brackets to the back of the mirror and the top of the dresser. The brackets interlock, providing a secure and stable connection. This method is particularly suitable for heavier mirrors, as it distributes the weight evenly across the dresser's surface. The use of mounting brackets ensures a robust mechanical connection that can withstand significant force.
The process entails precisely measuring and marking the locations for the brackets on both the mirror and the dresser. Pilot holes should be drilled before screwing the brackets into place to prevent splitting the wood. The brackets should be aligned precisely to ensure a flush and stable connection. This method allows for easy removal of the mirror if desired, without causing significant damage to the dresser.
2. Utilizing Mirror Clips: Mirror clips provide a less intrusive and more subtle method of attachment. These clips are typically made of plastic or metal and are designed to hold the mirror in place without obstructing its surface. They are often used for attaching frameless mirrors to dressers. This method is best suited for lighter mirrors, as the clips offer limited support for heavier weights. The clips are screwed into the dresser, providing a secure and stable hold.
To install mirror clips, carefully position the mirror on the dresser and mark the locations for the clips. Ensure that the clips are evenly spaced and adequately support the mirror's weight. Drill pilot holes and secure the clips with screws. The clips should be tightened to hold the mirror firmly in place, but not so tightly that they crack or damage the glass. This method is relatively simple and straightforward, making it a popular choice for DIY projects.
3. Employing Construction Adhesive: Construction adhesive provides a permanent and robust method for attaching a mirror to a dresser. This method is particularly well-suited for smooth, non-porous surfaces, such as painted wood or laminate. The adhesive creates a strong bond between the mirror and the dresser, providing exceptional stability. It is important to select a construction adhesive that is specifically designed for use with mirrors to avoid damaging the reflective coating.
Before applying the adhesive, thoroughly clean both the back of the mirror and the top of the dresser to remove any dirt, dust, or grease. Apply a generous amount of adhesive to the back of the mirror, following the manufacturer's instructions. Carefully position the mirror on the dresser and apply firm pressure to ensure a secure bond. Use painter's tape to hold the mirror in place while the adhesive cures. Allow the adhesive to cure completely before removing the tape. This method provides a permanent and seamless connection, but it is more difficult to remove the mirror without causing damage.
4. Attaching a Pre-Made Vanity Mirror: Some mirrors are sold as complete vanity sets, designed to be attached to a specific dresser model. These mirrors typically come with pre-drilled holes and appropriate mounting hardware. This method offers the easiest and most secure attachment, as the mirror is specifically designed to fit the dresser. Follow the manufacturer's instructions carefully to ensure proper installation.
Identify the corresponding holes on the dresser and align them with the holes on the mirror. Insert the screws or bolts provided with the mirror and tighten them securely. This method guarantees a stable and aesthetically pleasing result, as the mirror is specifically designed to complement the dresser. It also minimizes the risk of damaging either the mirror or the dresser during installation.
Preparing the Dresser and Mirror Surface
Regardless of the chosen attachment method, proper preparation of both the dresser and mirror surfaces is crucial for achieving a secure and lasting bond. This includes cleaning the surfaces, ensuring they are smooth and free of debris, and potentially applying a primer or sealant to enhance adhesion.
Cleaning: Thoroughly clean both the back of the mirror and the top of the dresser with a mild detergent and water. Remove any dirt, dust, grease, or old adhesive residue. Ensure that the surfaces are completely dry before proceeding with the attachment process. A clean surface promotes optimal adhesion and prevents the formation of air pockets that can weaken the bond.
Smoothing: Inspect the surfaces for any imperfections, such as scratches, dents, or uneven areas. Sand down any rough spots with fine-grit sandpaper to create a smooth and even surface. A smooth surface ensures proper contact between the mirror and the dresser, resulting in a more secure and stable attachment. Pay particular attention to the areas where the mirror will make contact with the dresser.
Priming and Sealing: Depending on the material of the dresser, consider applying a primer or sealant to enhance adhesion. A primer creates a more receptive surface for the adhesive or mounting brackets, while a sealant protects the dresser from moisture and prevents warping. Choose a primer or sealant that is compatible with both the dresser's material and the chosen attachment method. Follow the manufacturer's instructions carefully when applying the primer or sealant.
Safety Precautions: Safety is paramount when working with glass and tools. Wear safety glasses to protect your eyes from flying debris. Use gloves to protect your hands from sharp edges and adhesives. Work in a well-ventilated area to avoid inhaling harmful fumes. If using power tools, follow the manufacturer's instructions carefully. Never force any tool or component. If you encounter resistance, stop and re-evaluate the situation. Ensure that children and pets are kept away from the work area to prevent accidents.
By carefully selecting the appropriate mirror, choosing a suitable attachment method, and meticulously preparing the surfaces, a successful and aesthetically pleasing mirror attachment can be achieved. This simple addition can transform a dresser into a functional vanity, enhancing both its utility and its visual appeal.

Fitting Dresser Mirror

Heavy Duty Dresser Mirror Support Brackets Made In The Usa

Dresser Mirror Brackets September 2024 Your Guide

Style Your Dresser Like A Designer Showit Blog
:strip_icc()/114920061-cb47176aac644f4b9db1a653f23b498a.jpg?strip=all)
Easy Ways To Style A Dresser

How To Decorate A Dresser

Easiest Way To Hang A Mirror

Bedroom Dresser Decor

Glam Up A Bedroom With Stylish Mirror Utr Decorating

Styling Our Bedroom Dresser Emily A Clark Decor Top

