How To Replace Just The Glass On A Side Mirror
Replacing a damaged side mirror glass without replacing the entire mirror assembly can save significant time and money. This process is often simpler than expected and can be completed with common tools in most cases. This article provides a comprehensive guide to replacing the glass on a vehicle's side mirror.
Safety Precautions: Before beginning any work on a vehicle, ensure the engine is off and the parking brake is engaged. It's also advisable to wear safety glasses and gloves to protect against broken glass and sharp edges.
Assessment and Preparation: Begin by identifying the type of mirror attachment. Most modern vehicles use either adhesive or clips to secure the mirror glass to the backing plate. Carefully examine the mirror's edge and the area between the glass and the housing to determine the attachment method. This will dictate the tools and techniques required for removal.
Gathering Necessary Tools: The tools required vary depending on the attachment method. For adhesive-backed mirrors, a heat gun or hairdryer, a small suction cup, and a thin pry tool or putty knife are usually sufficient. For clip-on mirrors, a set of trim removal tools or small flathead screwdrivers are typically needed. Replacement adhesive or clips will also be required for the installation of the new glass. Ensure the new glass matches the existing mirror's dimensions and features, such as heating elements or blind spot monitoring.
Removing the Damaged Mirror Glass (Adhesive): If the mirror is held by adhesive, use a heat gun or hairdryer to gently warm the mirror's surface. This will soften the adhesive, making removal easier. Apply the suction cup to the mirror glass and create suction. Slowly and gently pull on the suction cup while using a thin pry tool or putty knife to work around the edges of the mirror, separating it from the adhesive. Take care not to apply excessive force, as this could shatter the glass. Be patient; the adhesive may require repeated heating and prying.
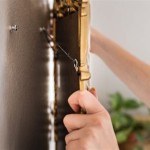
Removing the Damaged Mirror Glass (Clips): For clip-on mirrors, locate the clips holding the glass to the backing plate. These are typically positioned around the perimeter of the glass. Using trim removal tools or small flathead screwdrivers, carefully release the clips one by one. Work your way around the mirror, applying even pressure to avoid breaking the clips or the glass. Once all clips are released, the mirror should come free.
Cleaning the Backing Plate: Once the old mirror glass is removed, thoroughly clean the backing plate. Remove any remaining adhesive residue using an adhesive remover and a clean cloth. For clip-on mirrors, ensure the clip mechanisms are clean and undamaged. A clean surface will ensure proper adhesion or secure clipping of the new glass.
Installing the New Mirror Glass (Adhesive): Apply the replacement adhesive to the back of the new mirror glass or to the backing plate, following the adhesive manufacturer’s instructions. Carefully align the new mirror with the backing plate and press firmly into place. Hold the mirror in position for the time specified by the adhesive manufacturer to ensure a secure bond.
Installing the New Mirror Glass (Clips): Align the new mirror glass with the clips on the backing plate. Gently push the mirror onto the clips, ensuring each clip engages securely. A gentle click or snap will typically indicate proper engagement. Visually inspect the mirror to ensure it is flush with the housing and held securely in place.
Testing the New Mirror Glass: After installation, test the mirror’s adjustability by moving the mirror controls. Ensure the mirror moves smoothly and holds its position. If the mirror includes features like heating elements or blind spot monitoring, test these features to confirm they are functioning correctly.
Addressing Specific Mirror Types: Certain vehicles or mirror types may require slightly different procedures. Consult the vehicle's owner’s manual or online resources for model-specific instructions. These resources can provide valuable insights into unique clips, wiring configurations, or other specific details related to particular mirror assemblies.
Seeking Professional Assistance: While replacing mirror glass is often a straightforward process, complexities can arise. If uncertainty exists regarding any step of the process, or if damage is suspected to the mirror housing or internal components, consulting a qualified automotive technician is recommended. Professional assistance can ensure proper repair and prevent further damage.
Understanding Heated Mirrors: Replacing heated mirrors requires additional care. When disconnecting the wiring connector for the heating element, take note of its orientation to ensure correct reconnection. Handle the wiring gently to avoid damage. After installing the new glass and reconnecting the wiring, test the heating element to confirm its functionality.
Aftermarket Options: Aftermarket replacement mirror glass is readily available from various retailers and online marketplaces. Ensure that the aftermarket glass meets or exceeds the specifications of the original equipment manufacturer (OEM) glass. This includes factors like reflectivity, curvature, and durability. Verify compatibility with the vehicle's year, make, and model to ensure a proper fit.

How To Replace Your Vehicle S Side View Mirror Glass

How To Replace Your Vehicle S Side View Mirror Glass

How To Replace Your Vehicle S Side View Mirror Glass

Broken Side Mirror What Are The Repair Options And Cost

Side Mirror Repair How To Fix A Broken View Reader S Digest

Broken Side Mirror What Are The Repair Options And Cost

How To Replace A Broken Side View Mirror On Bmw Learn Glass Blowing

How To Remove The Side Mirror Glass On A 2005 Avalon Learn Blowing

Simply Brands Cut To Size Mirror Glass

How Do You Temporarily Fix A Broken Wing Mirror Turborevs