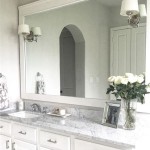
How to Use Trim to Frame a Mirror
Framing a mirror with trim elevates its appearance, transforming it from a functional object into a decorative piece. This project can be accomplished with various materials and techniques, offering flexibility to match diverse design aesthetics and skill levels.
Choosing the Right Trim
The selection of trim significantly impacts the final look of the framed mirror. Consider the existing décor of the room, the mirror's size and shape, and the desired aesthetic when choosing a trim material. Common options include wood, polyurethane, and metal. Wood offers a classic, natural feel and can be stained or painted. Polyurethane provides a lightweight, cost-effective alternative that is easily molded and resistant to moisture. Metal trims, such as aluminum or brass, offer a sleek, modern look.
Measuring and Cutting the Trim
Accurate measurements are crucial for a professional-looking frame. Carefully measure the mirror's dimensions and add the desired frame width to calculate the total length of trim needed for each side. When using wood trim, a miter saw is recommended for clean, angled cuts at 45 degrees to create seamless corners. For polyurethane, a sharp utility knife or fine-tooth saw can be used. Metal trims often require specialized cutting tools. Ensure safety precautions are taken when using any cutting tools.
Preparing the Mirror and Trim
Before attaching the trim, ensure both the mirror and the trim are clean and free of dust or debris. Lightly sanding the trim can improve adhesion, especially when painting or staining. If painting or staining the trim, it's generally recommended to do this before attaching it to the mirror to avoid overspray or drips on the mirror surface. Allow sufficient drying time according to the manufacturer's instructions.
Adhering the Trim to the Mirror
Several methods can be employed to attach the trim to the mirror. Construction adhesive offers a strong bond and is suitable for most trim materials. For lighter trims, mirror mastic can be used. Apply the adhesive to the back of the trim in a consistent bead, ensuring adequate coverage. Carefully position the trim onto the mirror's edge, pressing firmly to ensure a secure bond. Use painter's tape to hold the trim in place while the adhesive dries completely.
Securing the Frame
While the adhesive provides the primary bond, small finishing nails or brads can further secure the frame and provide a more finished look. This is especially helpful for larger or heavier frames. Predrill small pilot holes to prevent the trim from splitting, particularly when working with wood. Countersink the nails and fill the holes with wood putty for a seamless finish. Once the putty dries, lightly sand and touch up with paint or stain if necessary.
Finishing Touches
After the frame is securely attached and the adhesive has fully cured, apply a sealant along the inner edge of the frame where it meets the mirror. This helps prevent moisture from seeping behind the frame and damaging the mirror's silvering. Clear silicone sealant is a good choice for this purpose, as it remains flexible and provides a waterproof seal. Apply a thin bead and smooth it with a damp finger or sealant tool.
Hanging the Framed Mirror
The method for hanging the framed mirror will depend on its size and weight. For lighter mirrors, adhesive-backed picture hangers or mirror clips may suffice. Heavier mirrors require more robust hanging hardware, such as D-rings and wire or a French cleat system. Ensure the chosen hardware is appropriate for the weight and size of the mirror and follow the manufacturer's instructions for installation.
Addressing Common Challenges
Certain challenges may arise during this project. Uneven mirror edges can be addressed with shims placed behind the trim to create a level surface. Gaps at the corners can be filled with wood filler or caulk, then sanded and painted for a seamless appearance. When working with delicate trim, extra care should be taken to avoid damaging it during cutting and installation. Practice on scrap pieces beforehand can help build confidence and refine techniques.
Framing a mirror with trim is a rewarding project that can significantly enhance the aesthetic of any space. By following these steps and employing careful attention to detail, one can achieve a professional-looking result that adds a touch of elegance and sophistication.

Easy Diy Tutorial Adding Trim Around A Giant Mirror For Ers

How To Frame A Mirror

How To Frame Out That Builder Basic Bathroom Mirror For 20 Or Less

Diy Bathroom Mirror Frame With Molding The Happier Homemaker

Frame Your Bathroom Mirror With Baseboard Trim Mirrors Diy Large

Framing A Mirror Without Miter Cuts The Kim Six Fix

The Kids Bathroom Mirror Gets Framed House Of Hepworths

How To Frame A Bathroom Mirror Mirrors Diy Large Makeover

How To Frame A Bathroom Mirror Lowe S

Easy Diy Tutorial Adding Trim Around A Giant Mirror For Ers


